
Saltwater Aquarium Water Change & Parameter Check Protocol
Overall Structure
Each tank system has three aquariums with a singular sump system filtering the water for all three. As such, each triplicate system is in reality one tank, which should be considered when designing an experiment. The systems are numbered clockwise from 1-12, with tanks 1-6 being on the left, and 7-12 on the right.
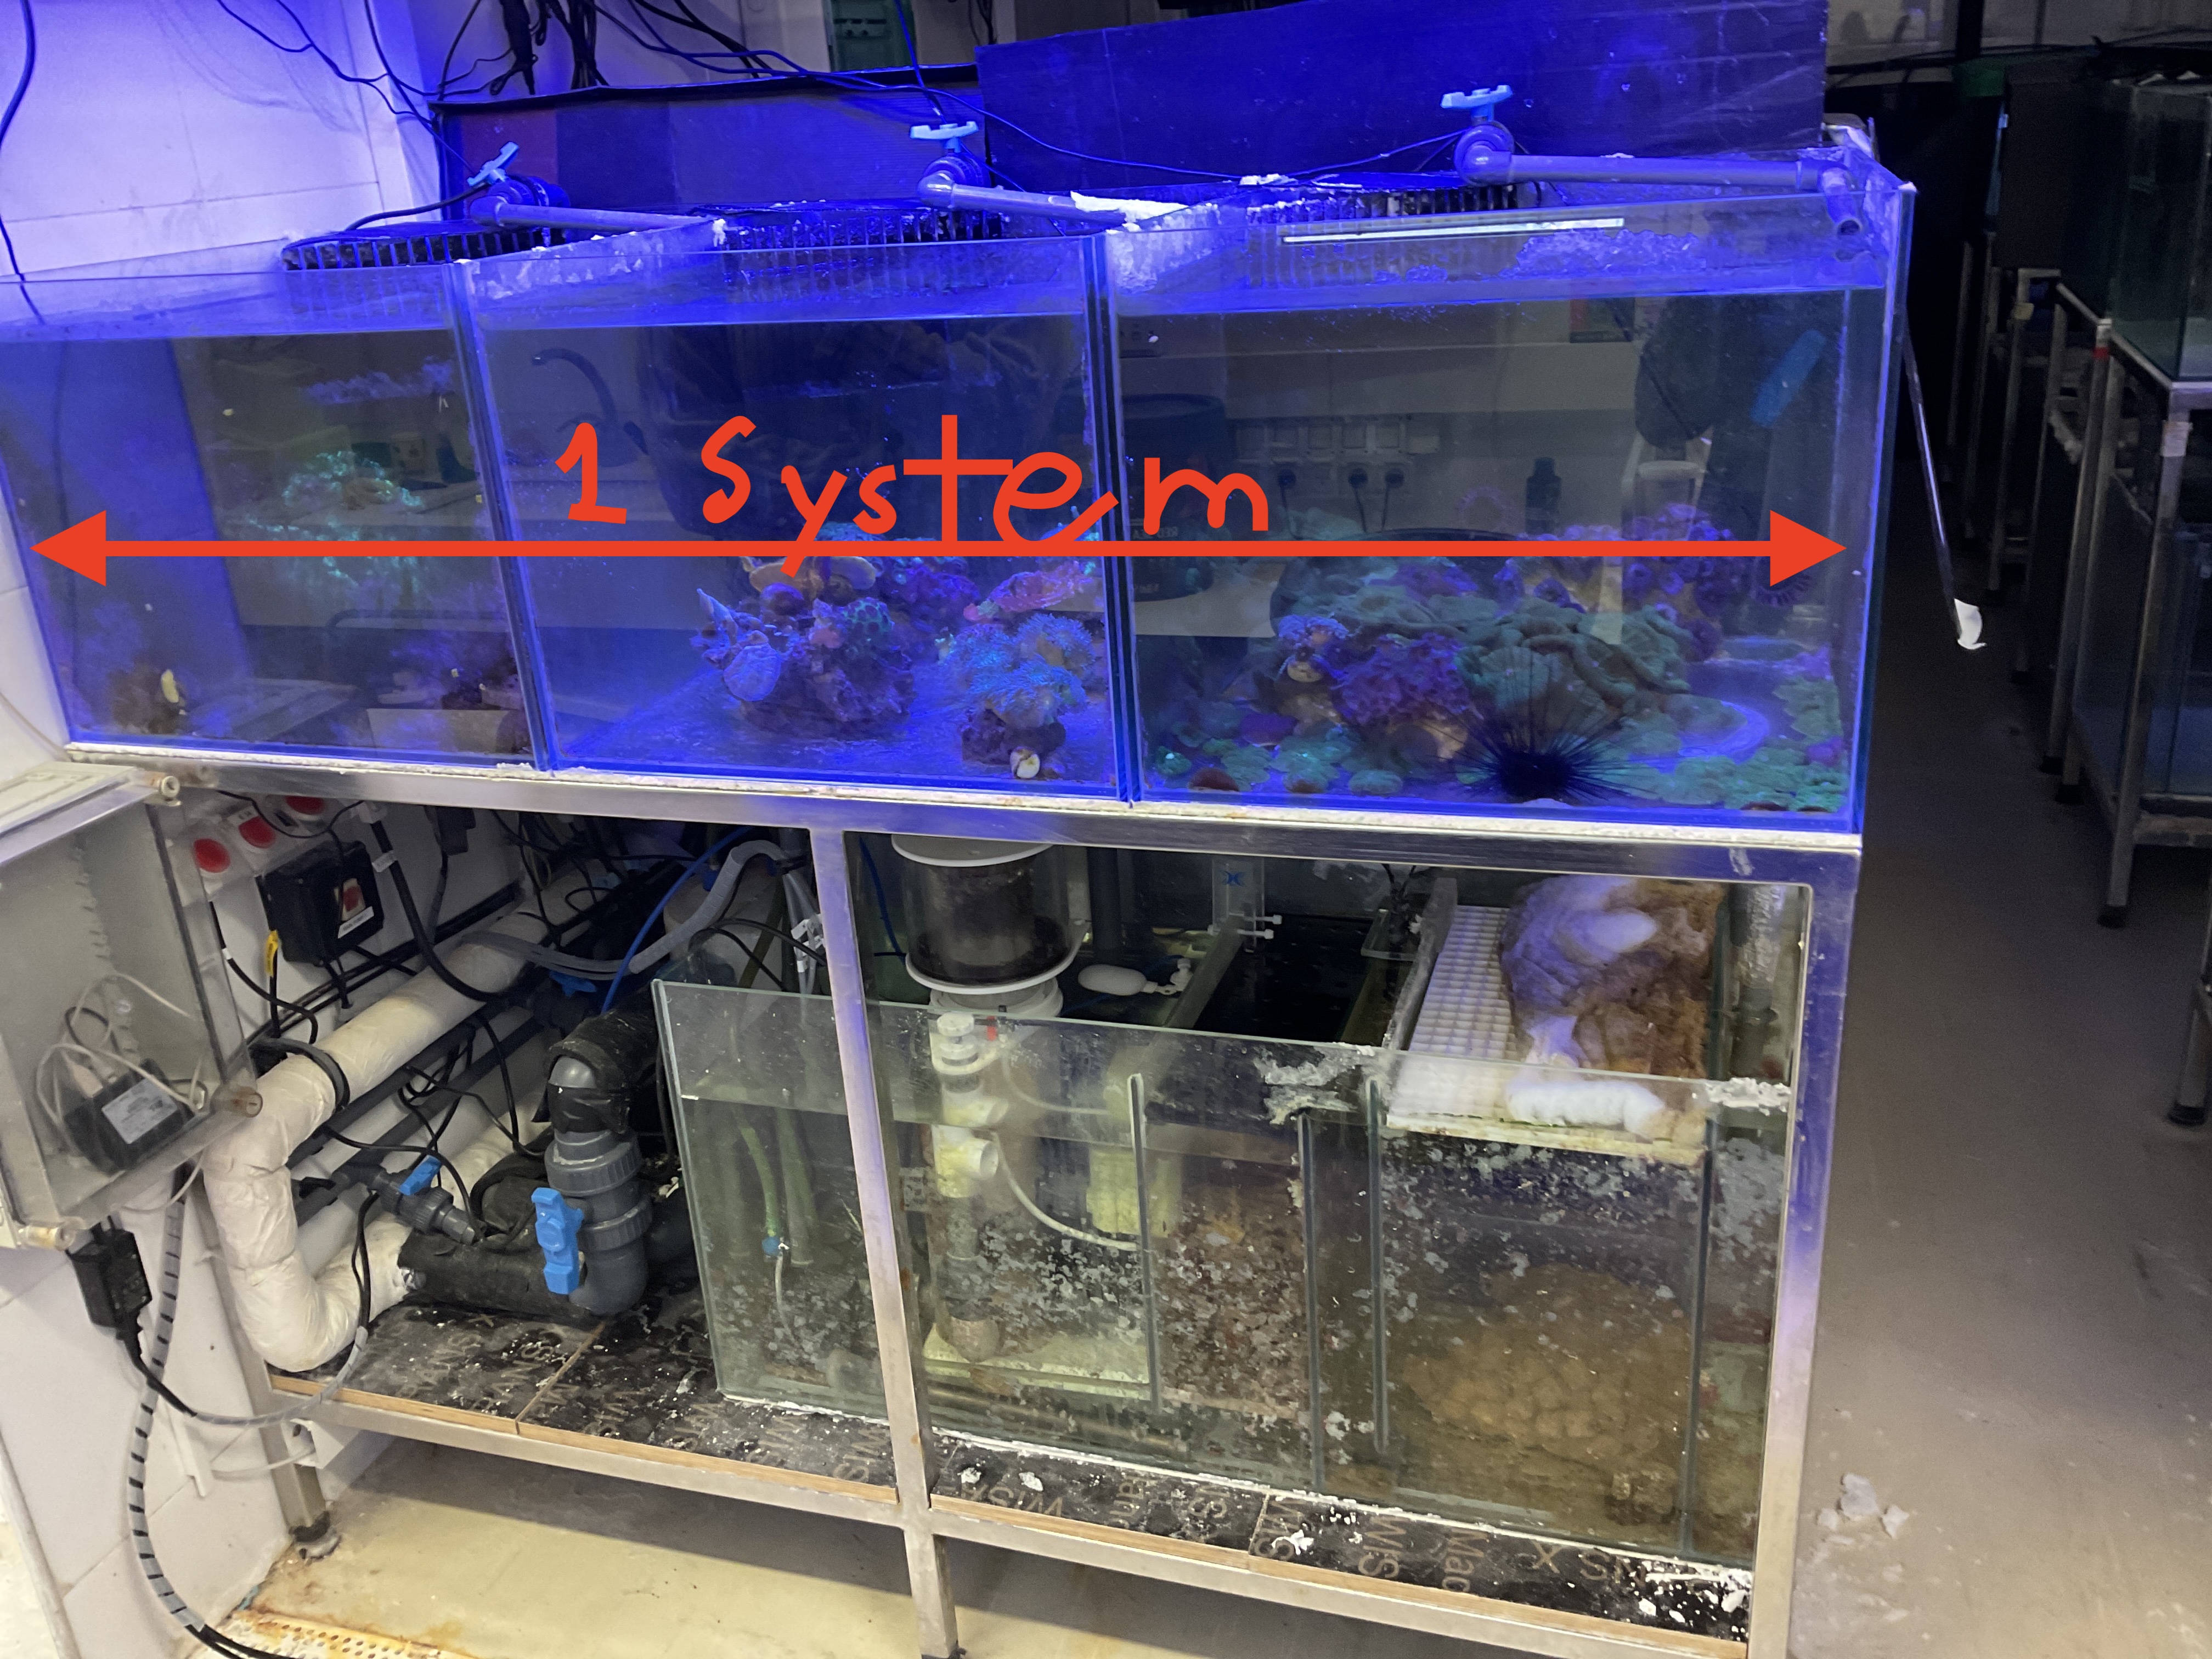
Figure 1: Annotated aquarium photo.
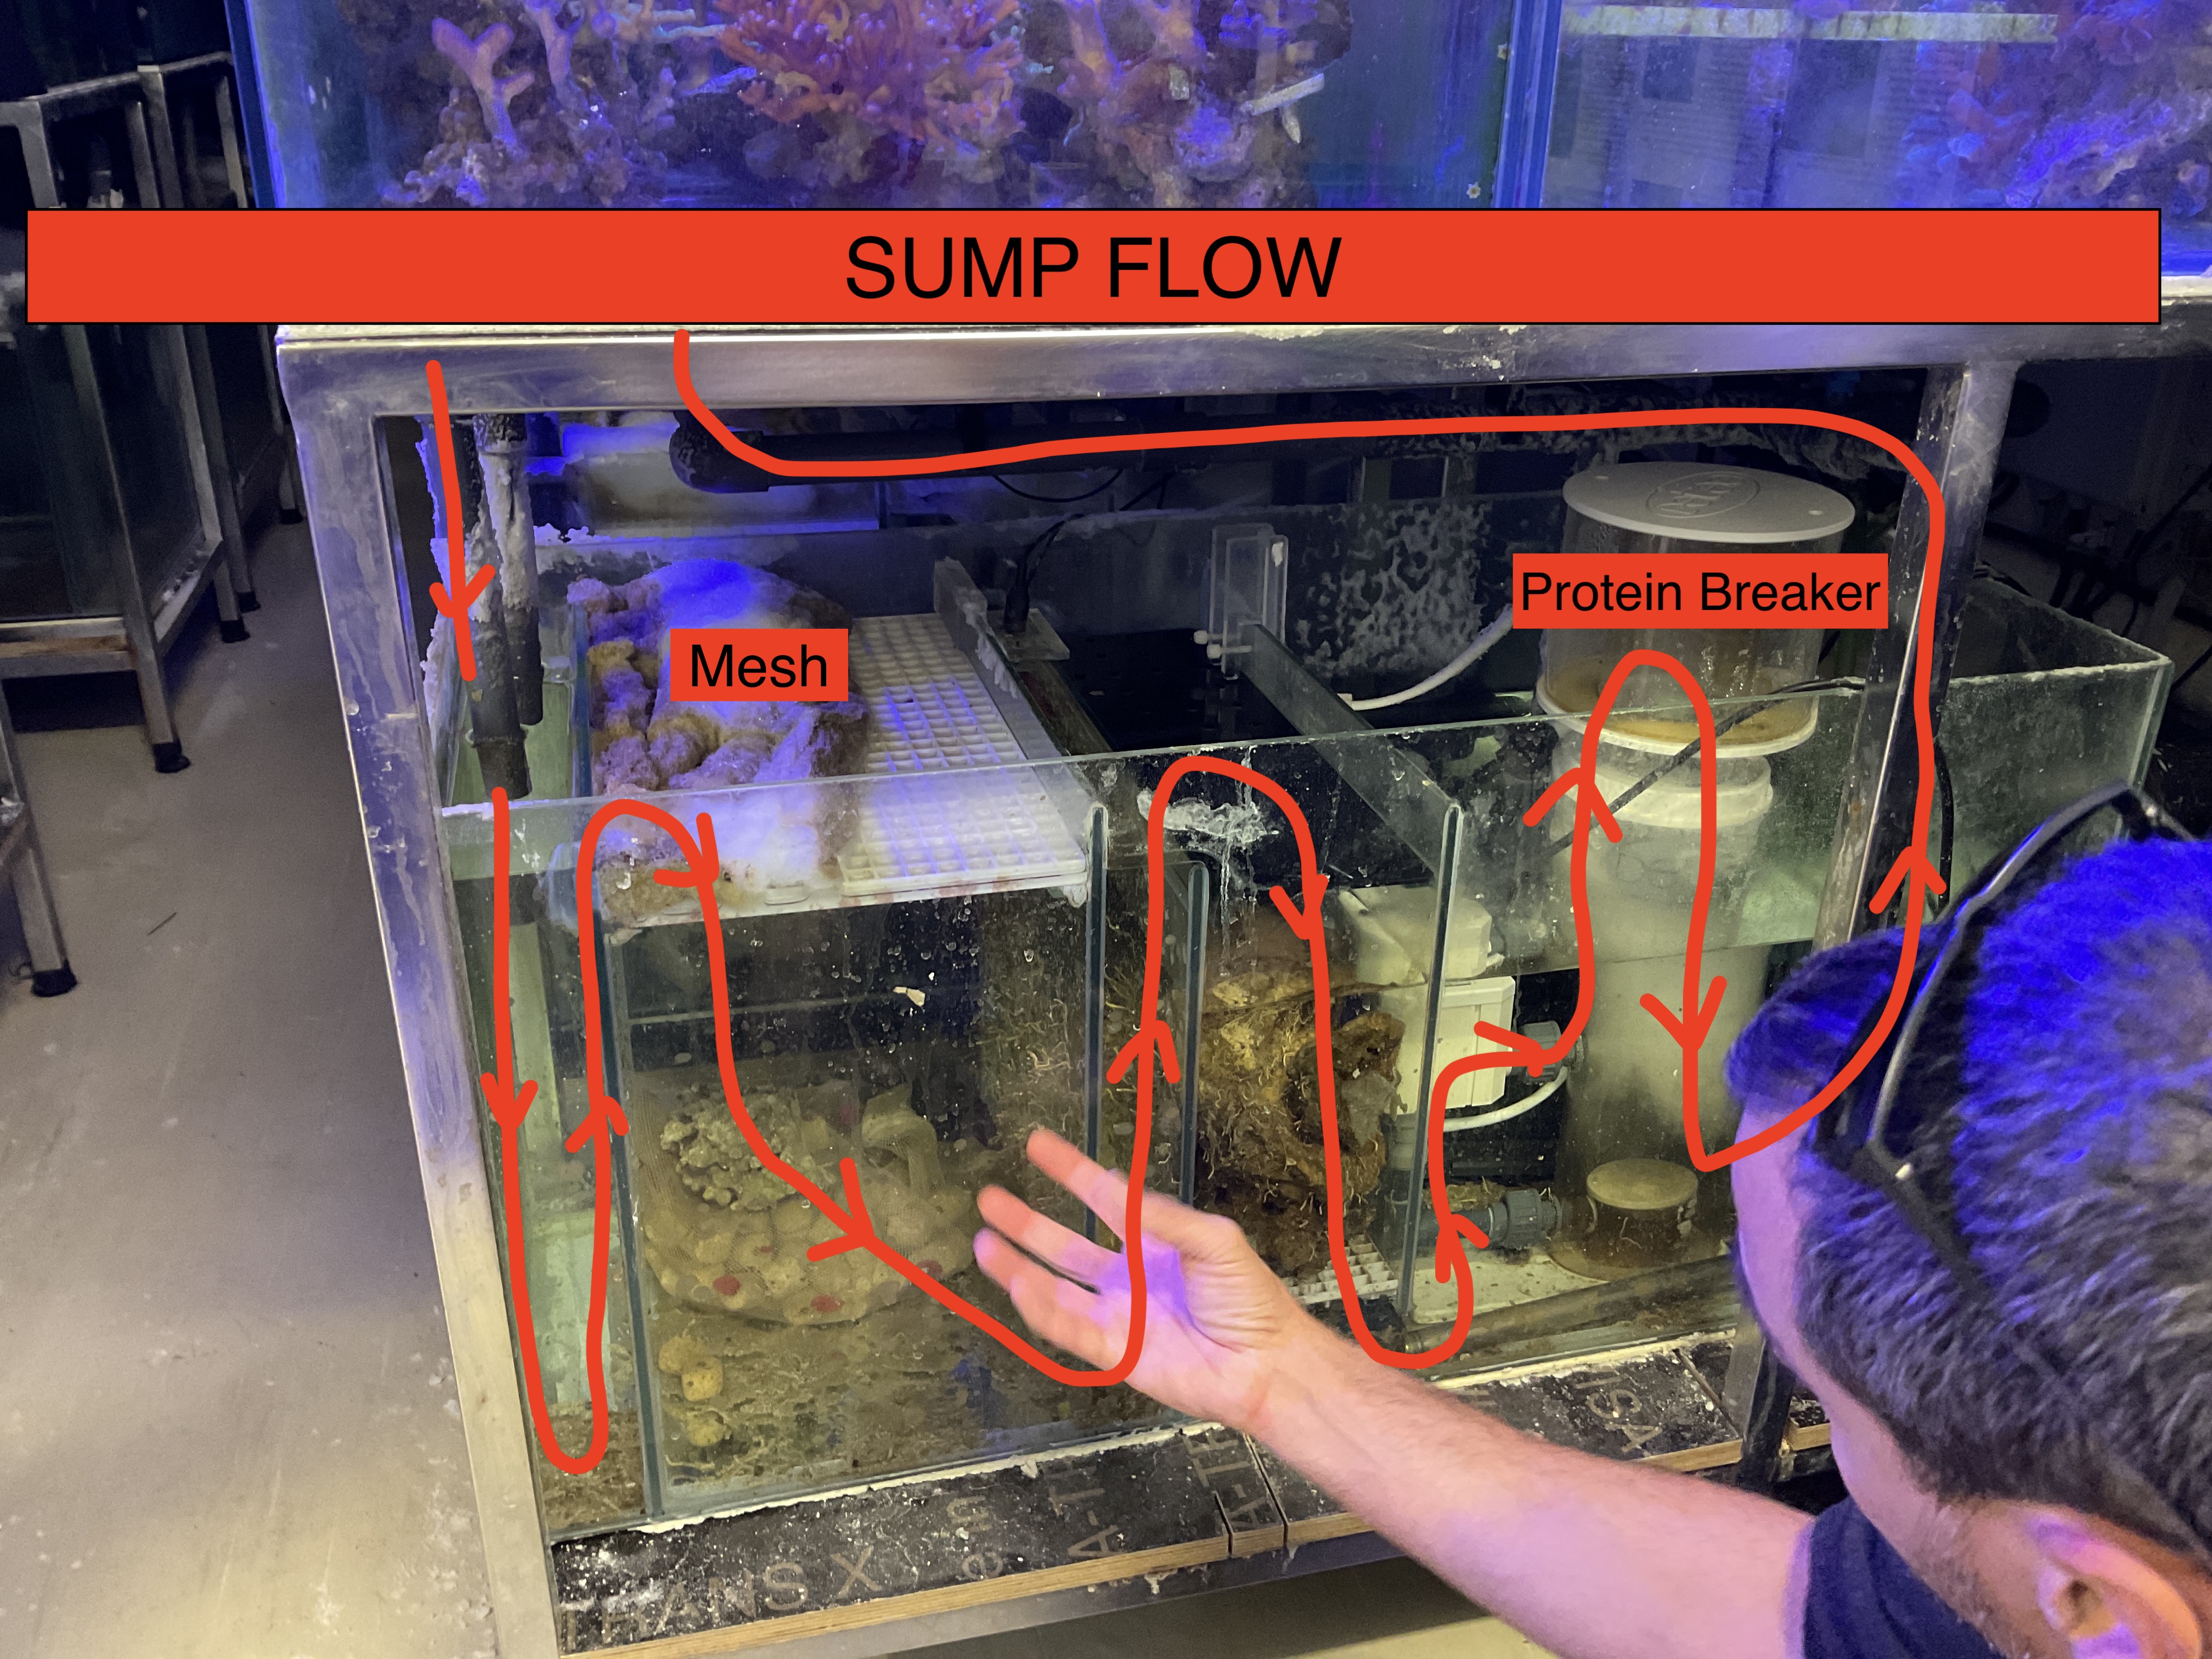
Figure 2: Sump system overview.
Pre-Water Change: Parameter Testing
Before beginning the water change, it is recommended to perform water quality parameter testing. Temperature and salinity can be measured with the WTW tool with the salinity probe, while KH, Ca, Mg, nitrate, nitrite, phosphorus, and ammonia are measured using individual test kits for each parameter. Detailed specific instructions for each test kit can be located in the box for each kit. Note that for titration calculations, the number on the charts correspond to the volume consumed in the syringe, not the volume remaining in the syringe. Additionally, some kits have separate scales for saltwater and freshwater.
While testing each parameter, record it in a table like this:
| Tank # | KΗ | Ca | Mg | PPM | T | Nitrate | Nitrite | P | A |
|---|---|---|---|---|---|---|---|---|---|
| 1 | 8.7 | 390 | 1360 | 35 | 24.5 | 0.2 | 0 | 0 | 0 |
| 2 | |||||||||
| 3 | |||||||||
| 4 | |||||||||
| 5 |
Water Change Steps
Step 1: Turn off the pump
Turn off the aquarium sump pump by flipping the red switch underneath the system.
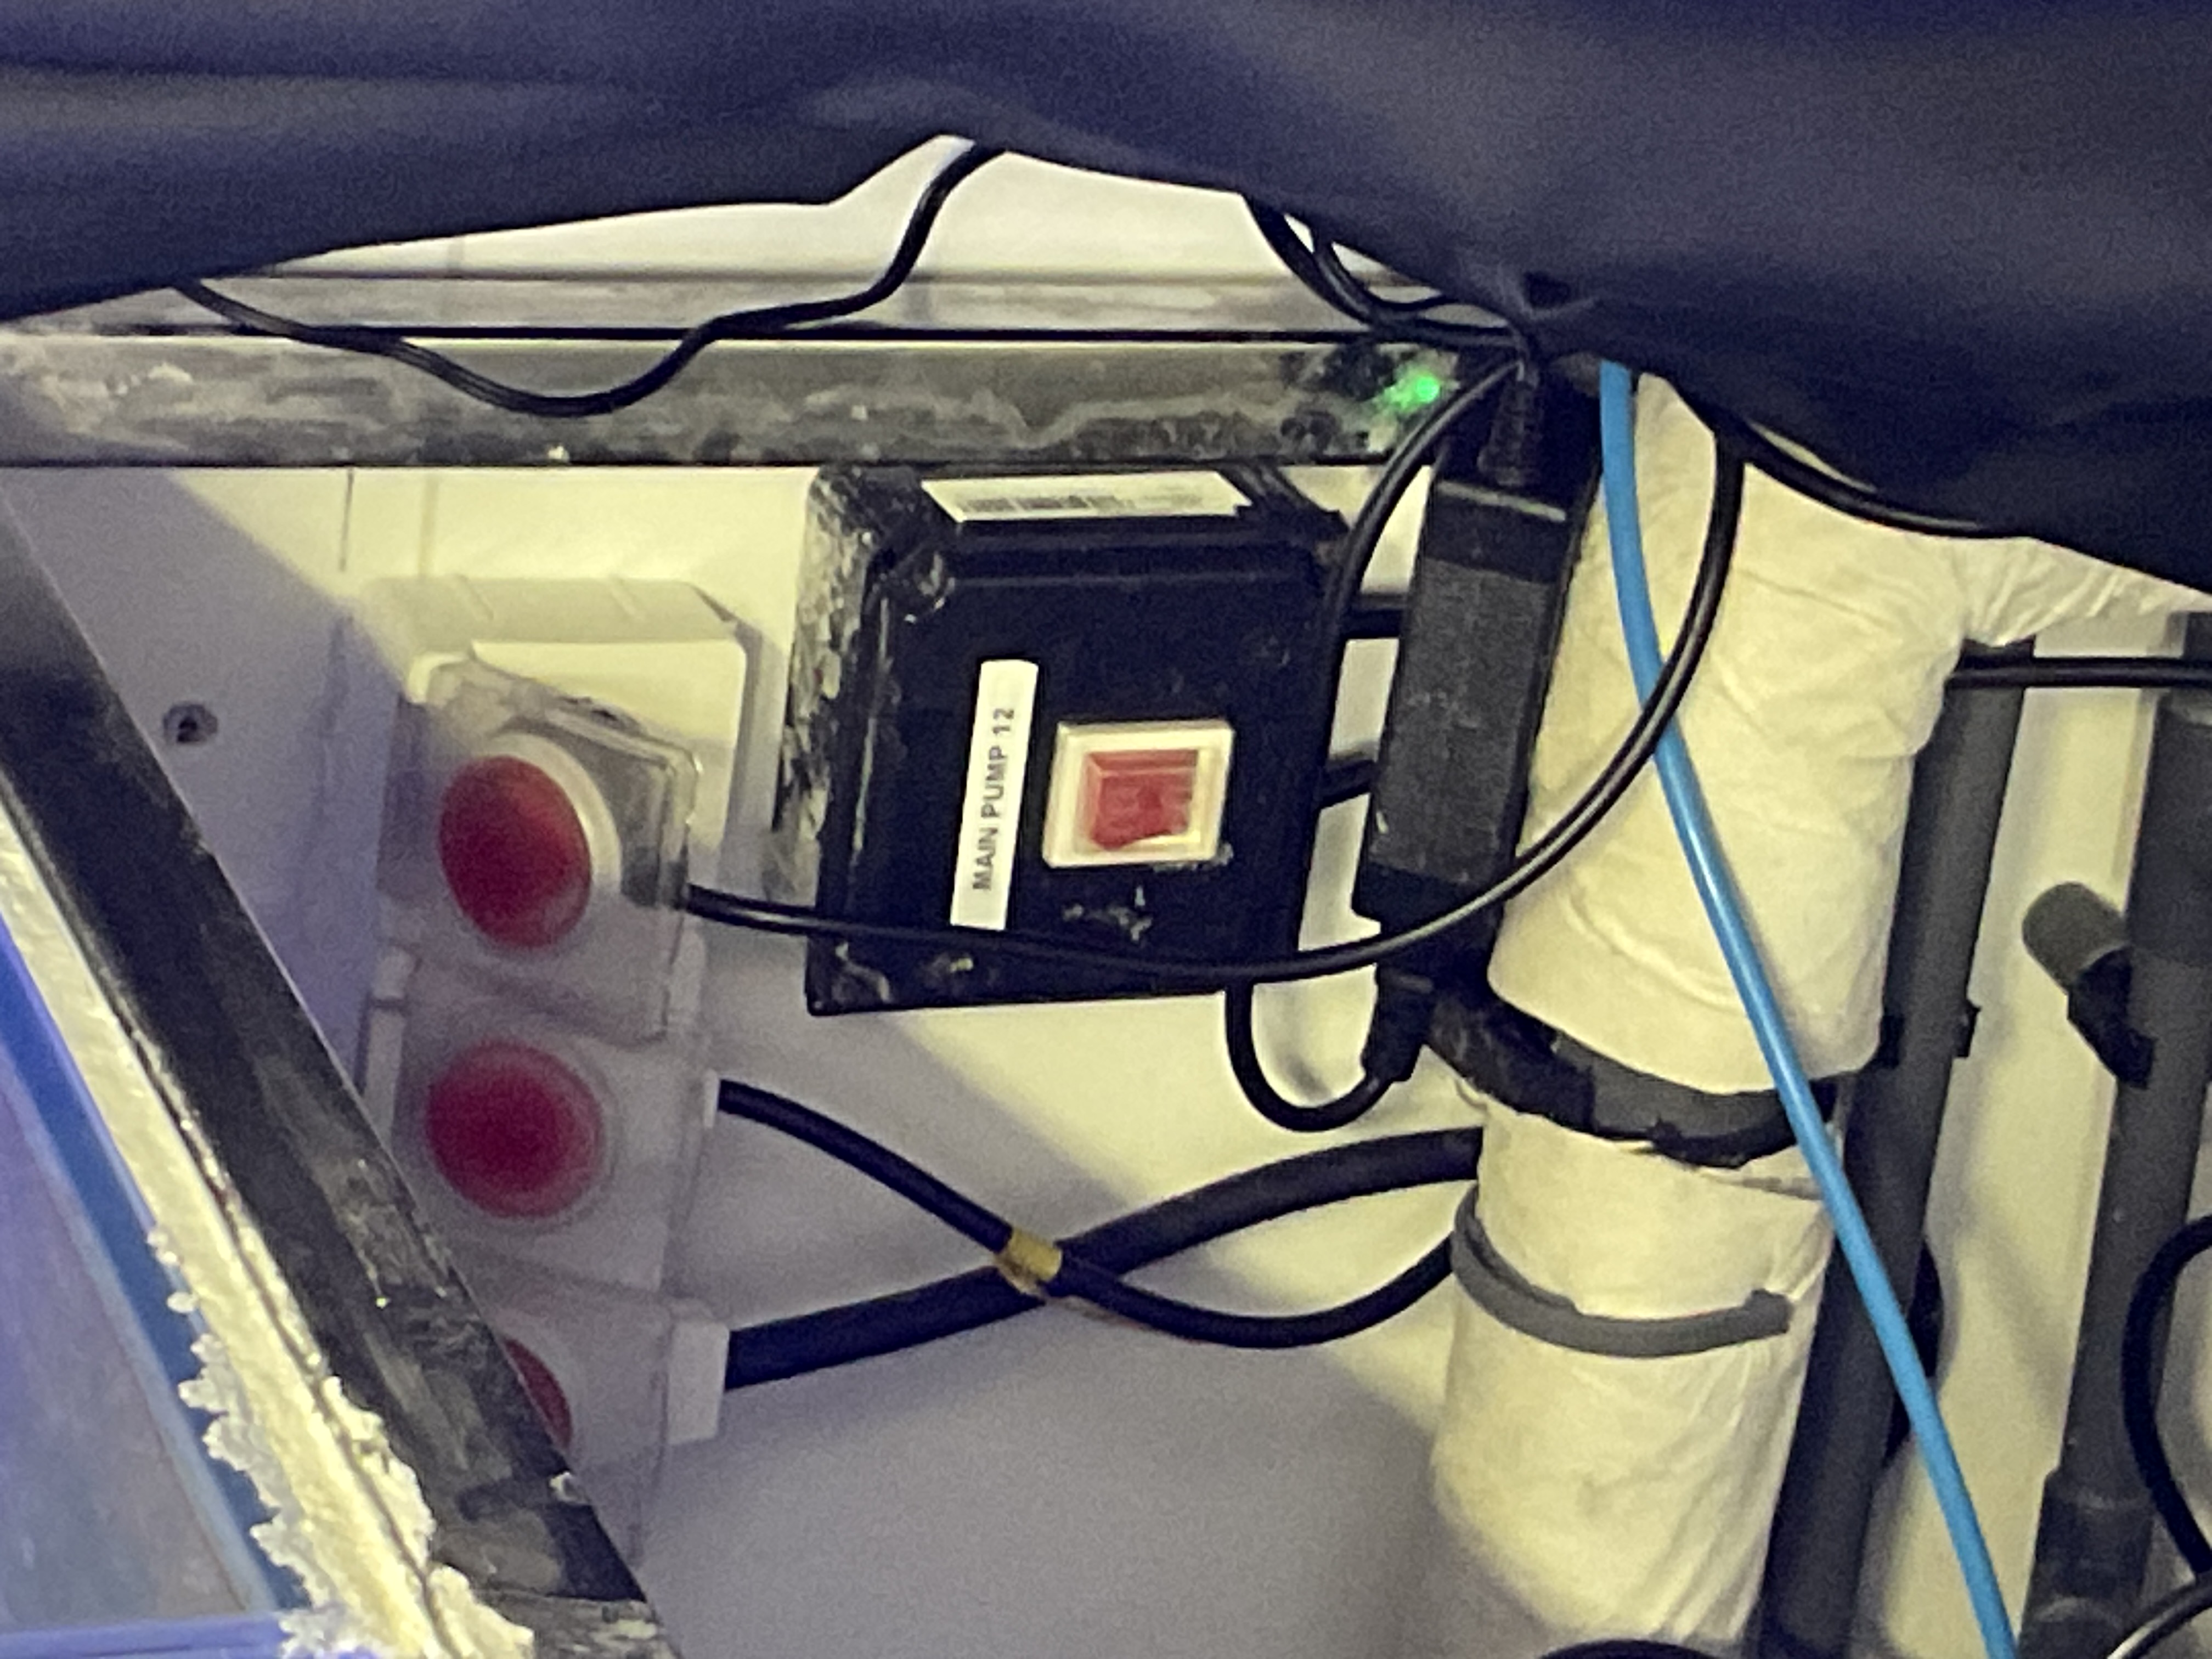
Figure 3: Red switch underneath the system turns off the sump pump.
If you are reducing water levels below additional pumps added to the aquarium for flow, you should turn the pumps off as well. Turning off additionally pumps will make it easier for debris to settle when vacuuming water out of the tank.
Step 2: Glass Cleaning
Use the scraper and/or a sponge to clean debris off the sides and bottom of the tank. As you move from one tank to another, this allows the debris to settle on the bottom of the aquarium instead of floating in the water, which makes it easier to remove with the vacuum later.

Figure 4: Sponge cleaning.
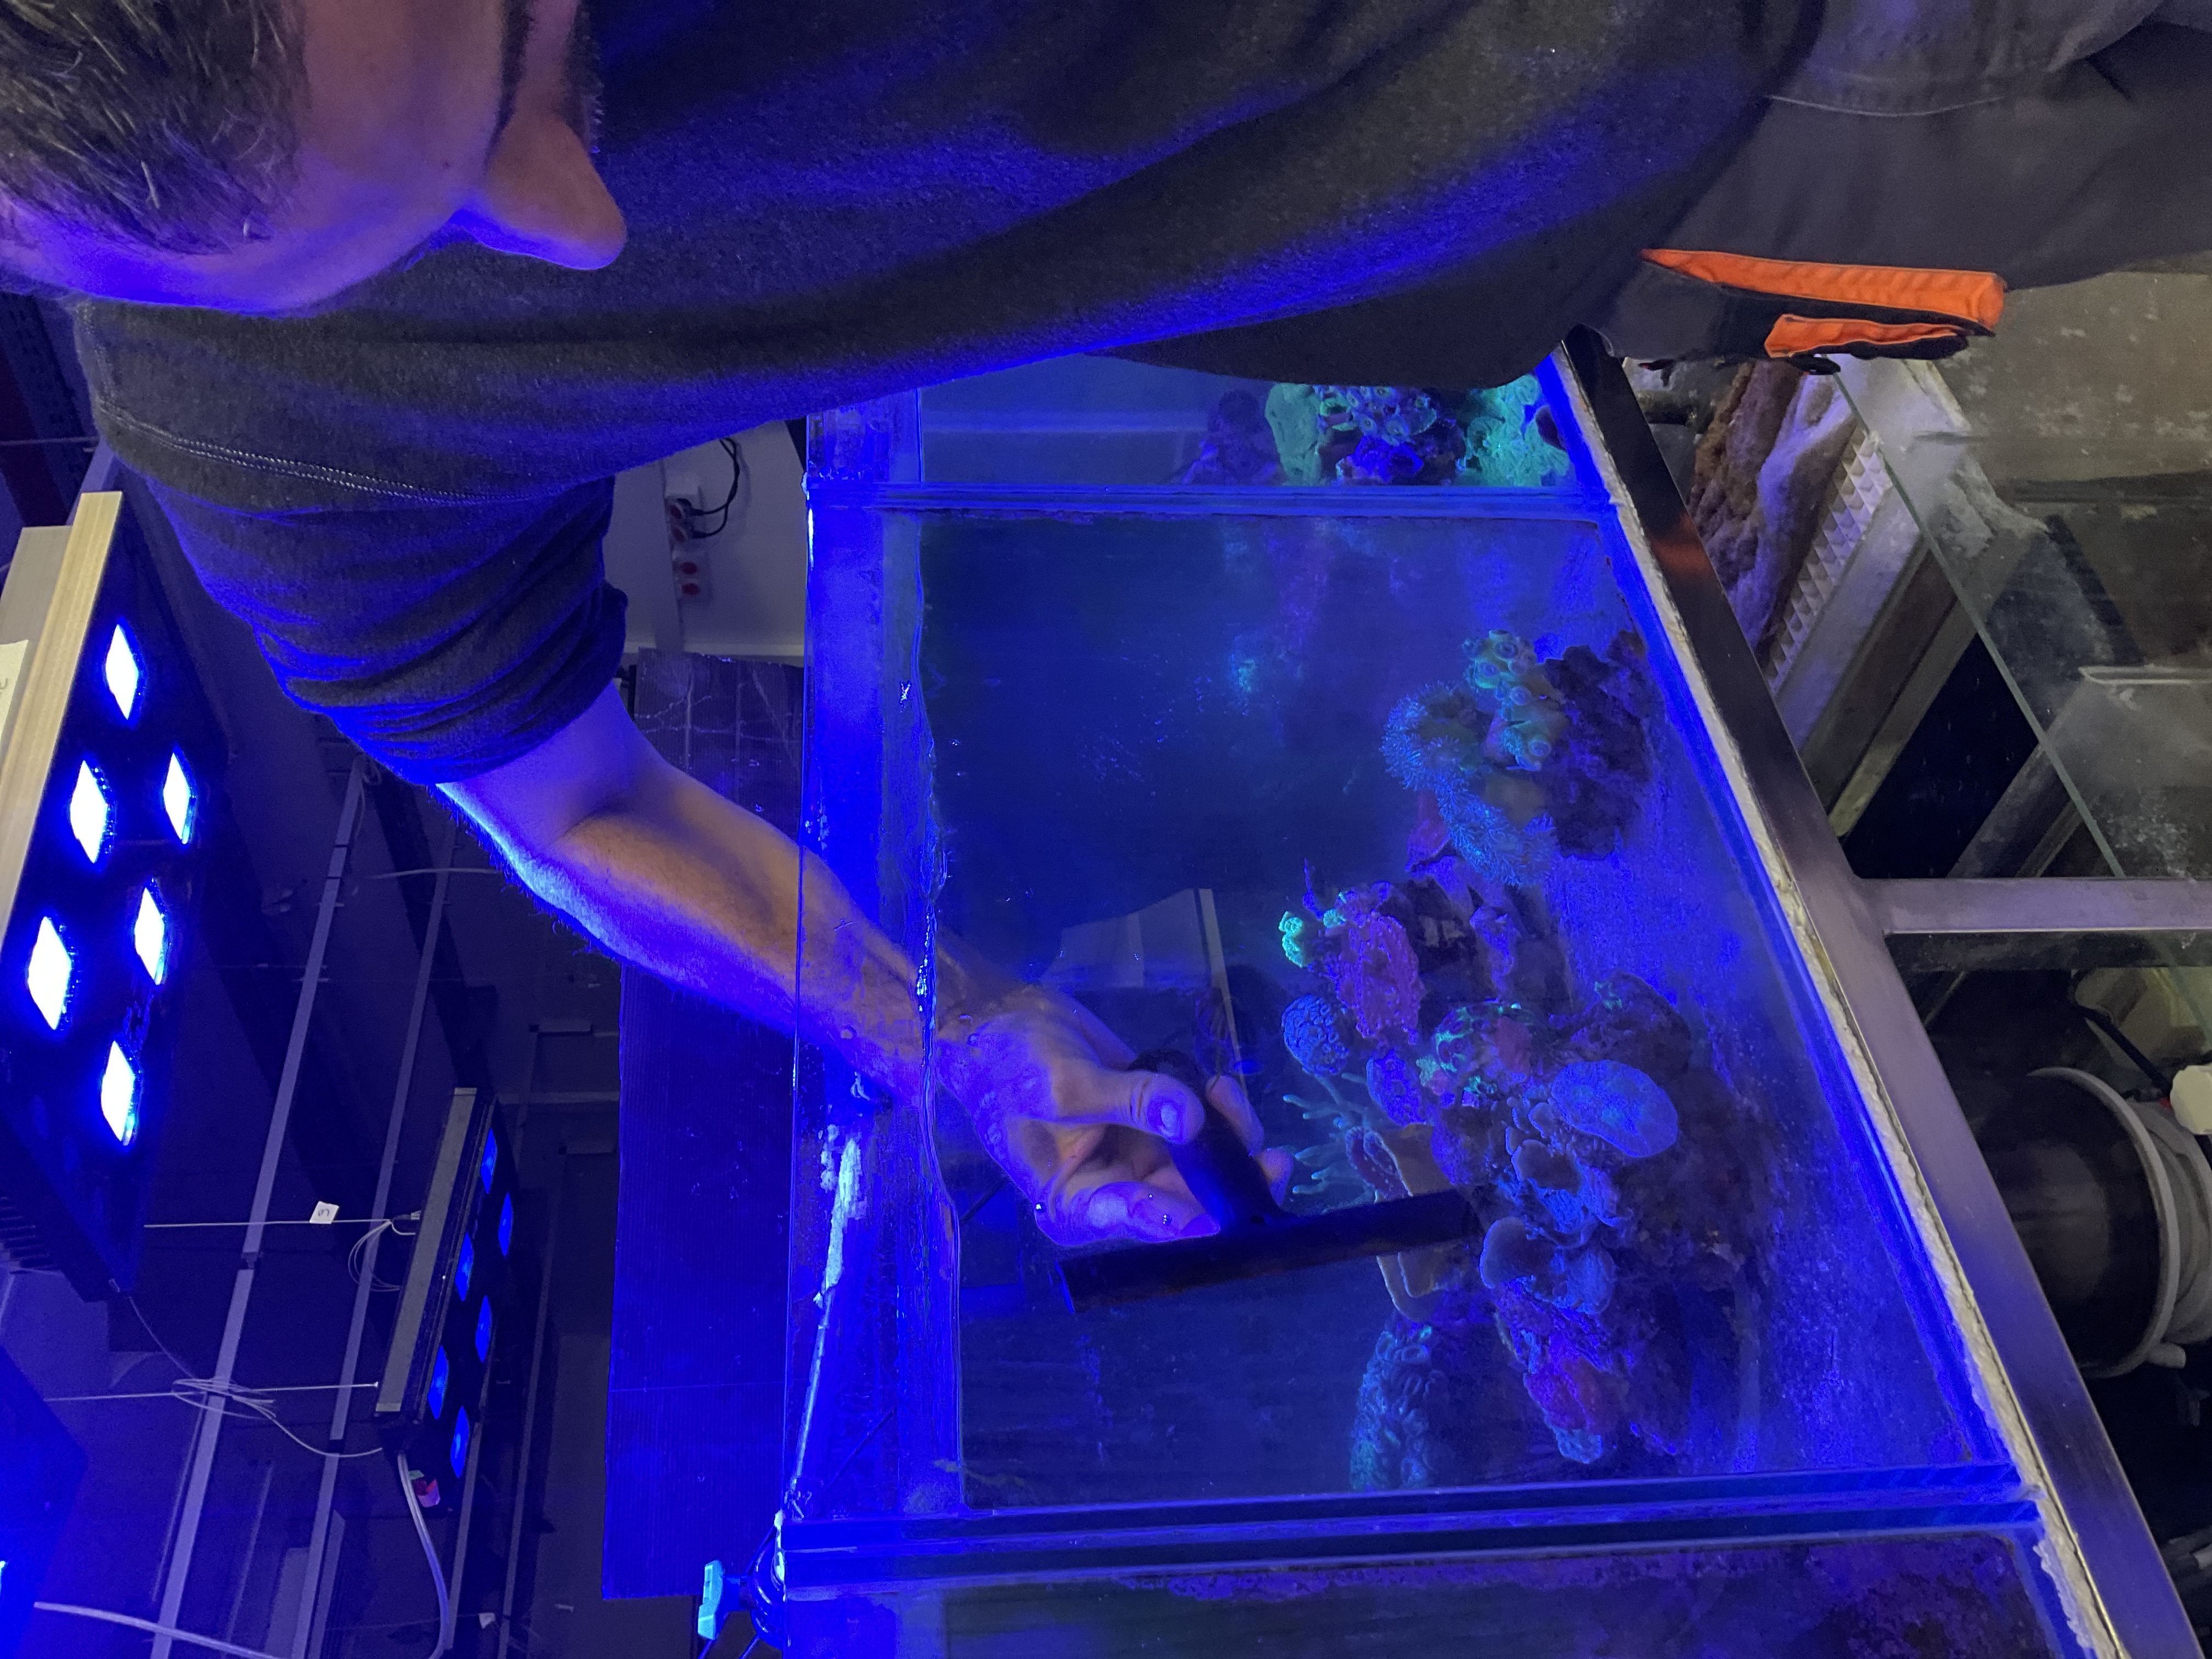
Figure 5: Scraper cleaning.
At this stage, rotate or replace the mesh located on the upper level of the sump system.
Step 3: Protein Breaker Maintenance
Remove the protein breaker head by unscrewing it counterclockwise from the sump system. It was difficult to remove, check for salt build up in threads and remove. Clean the protein breaker head in the sink using ideally DDW water and a sponge. DO NOT USE SOAP.
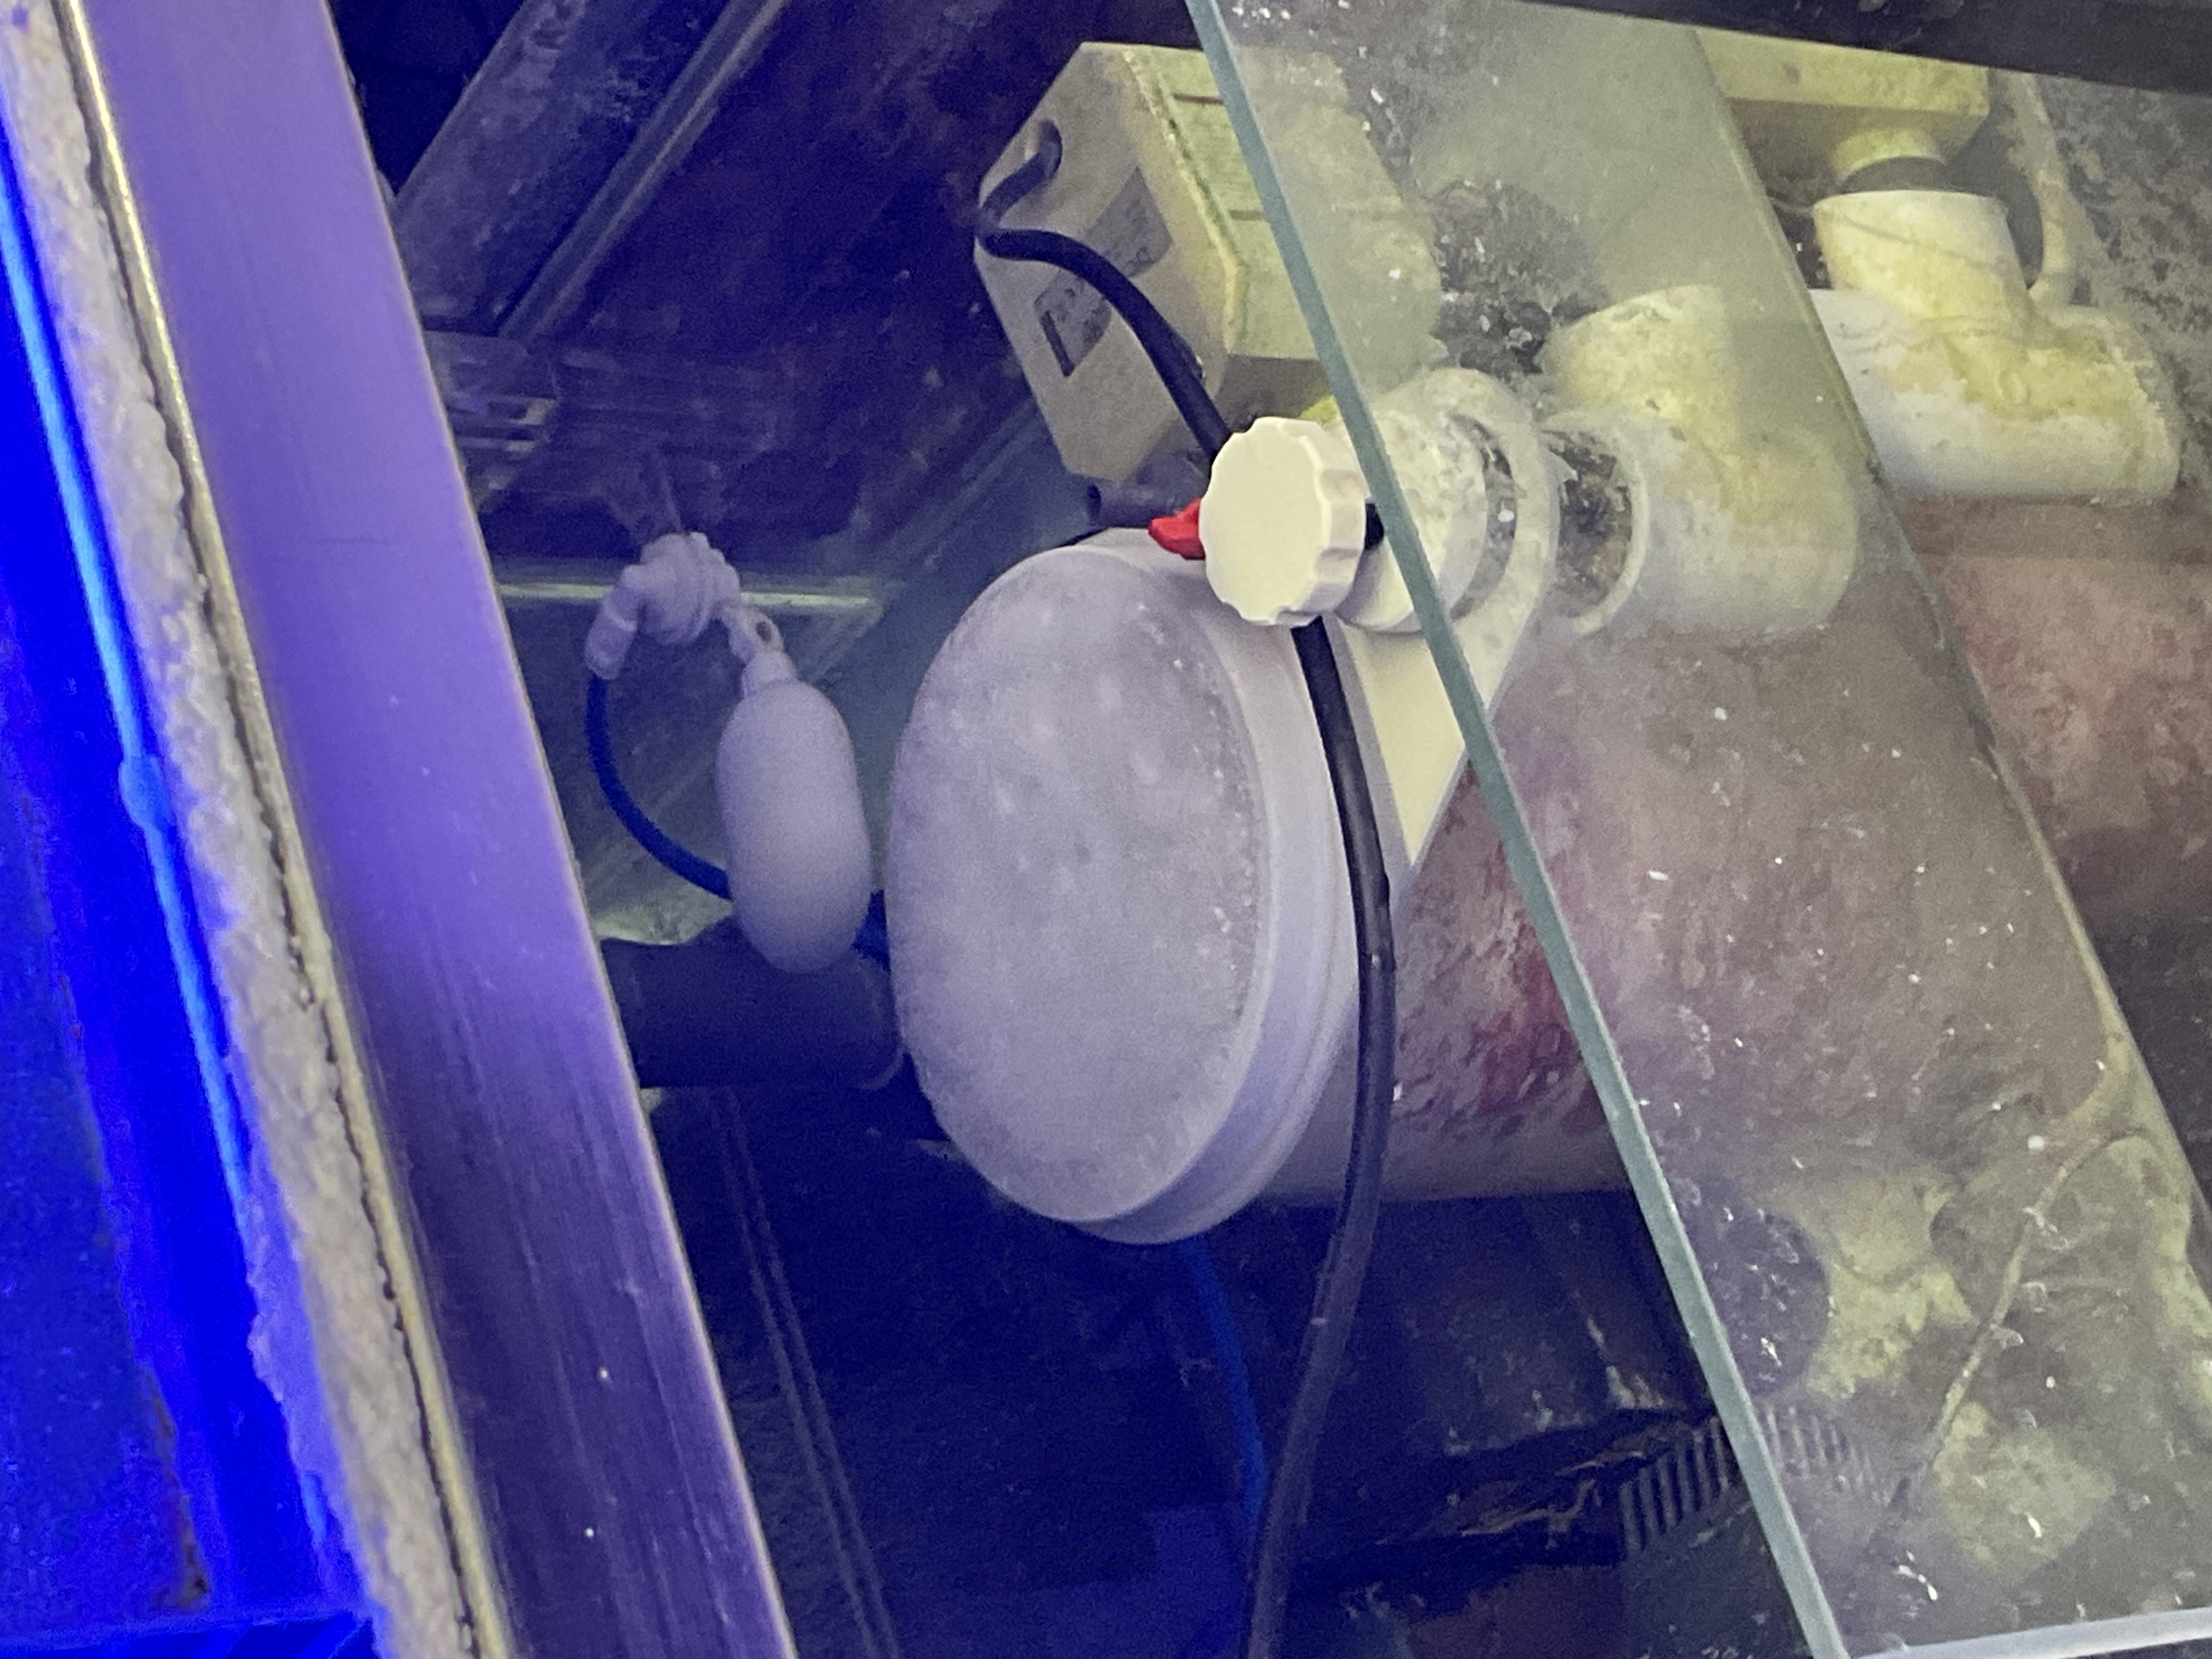
Figure 6: Removing the protein breaker head.
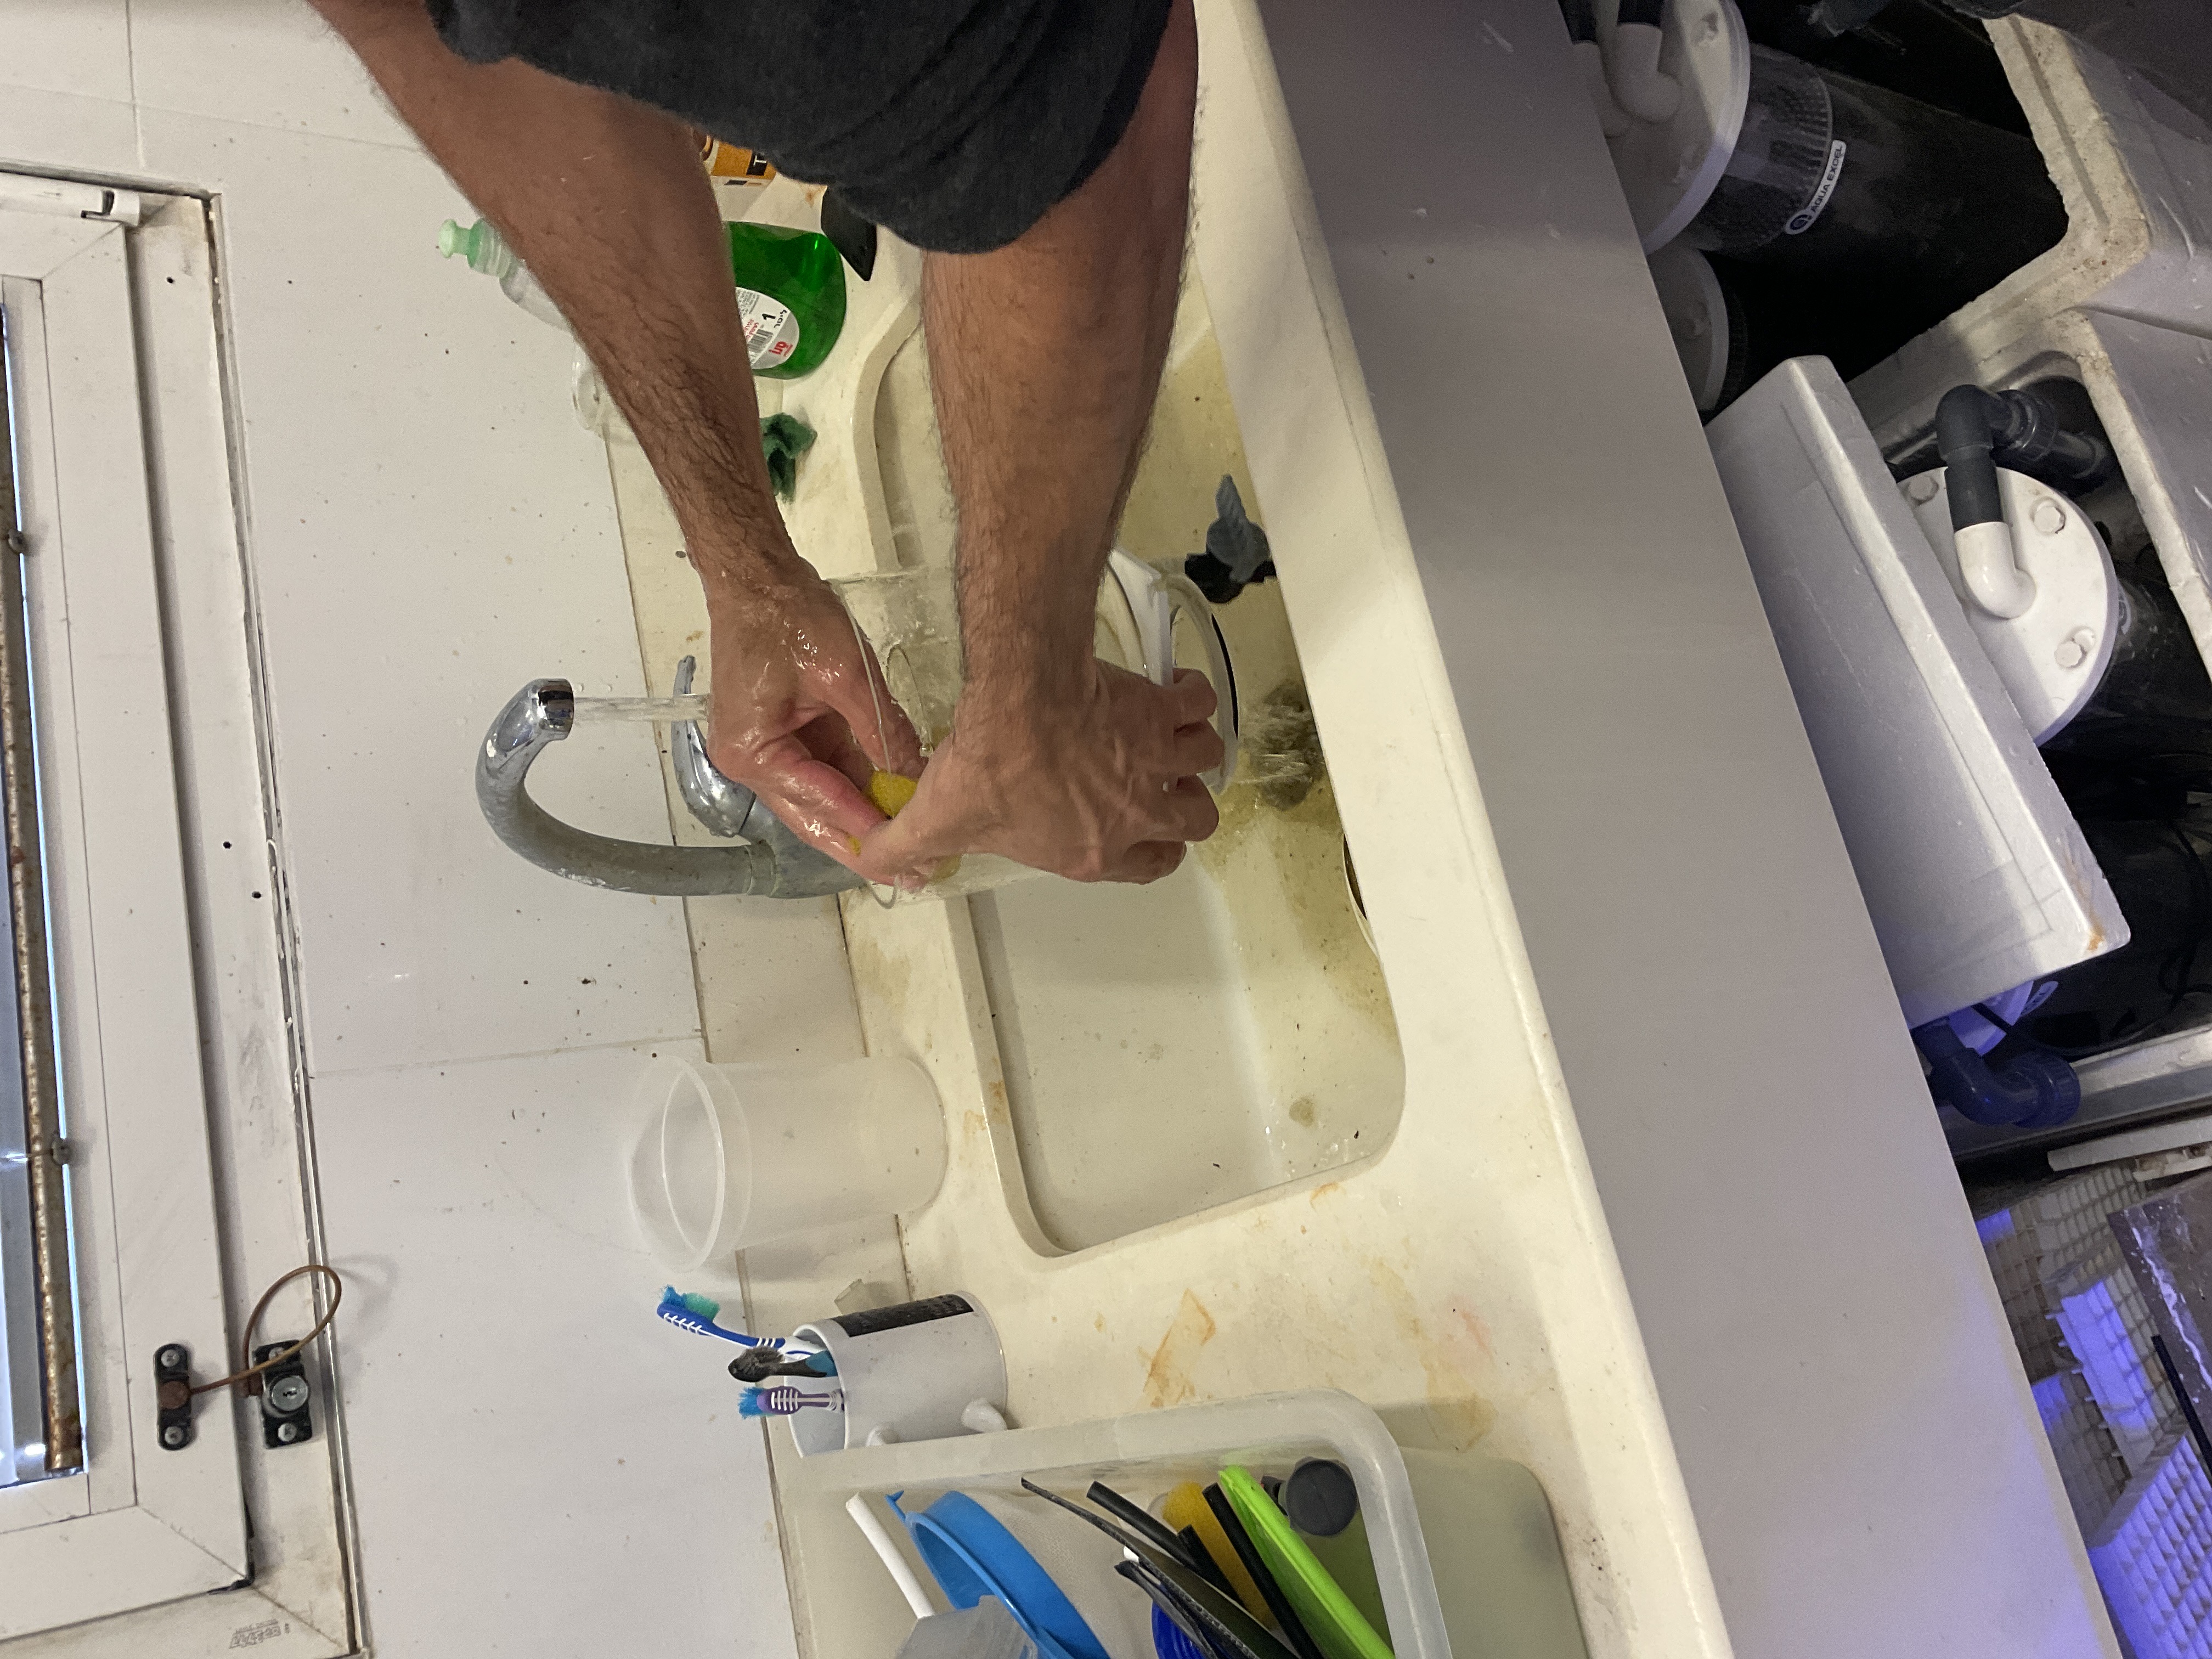
Figure 7: Cleaning process.
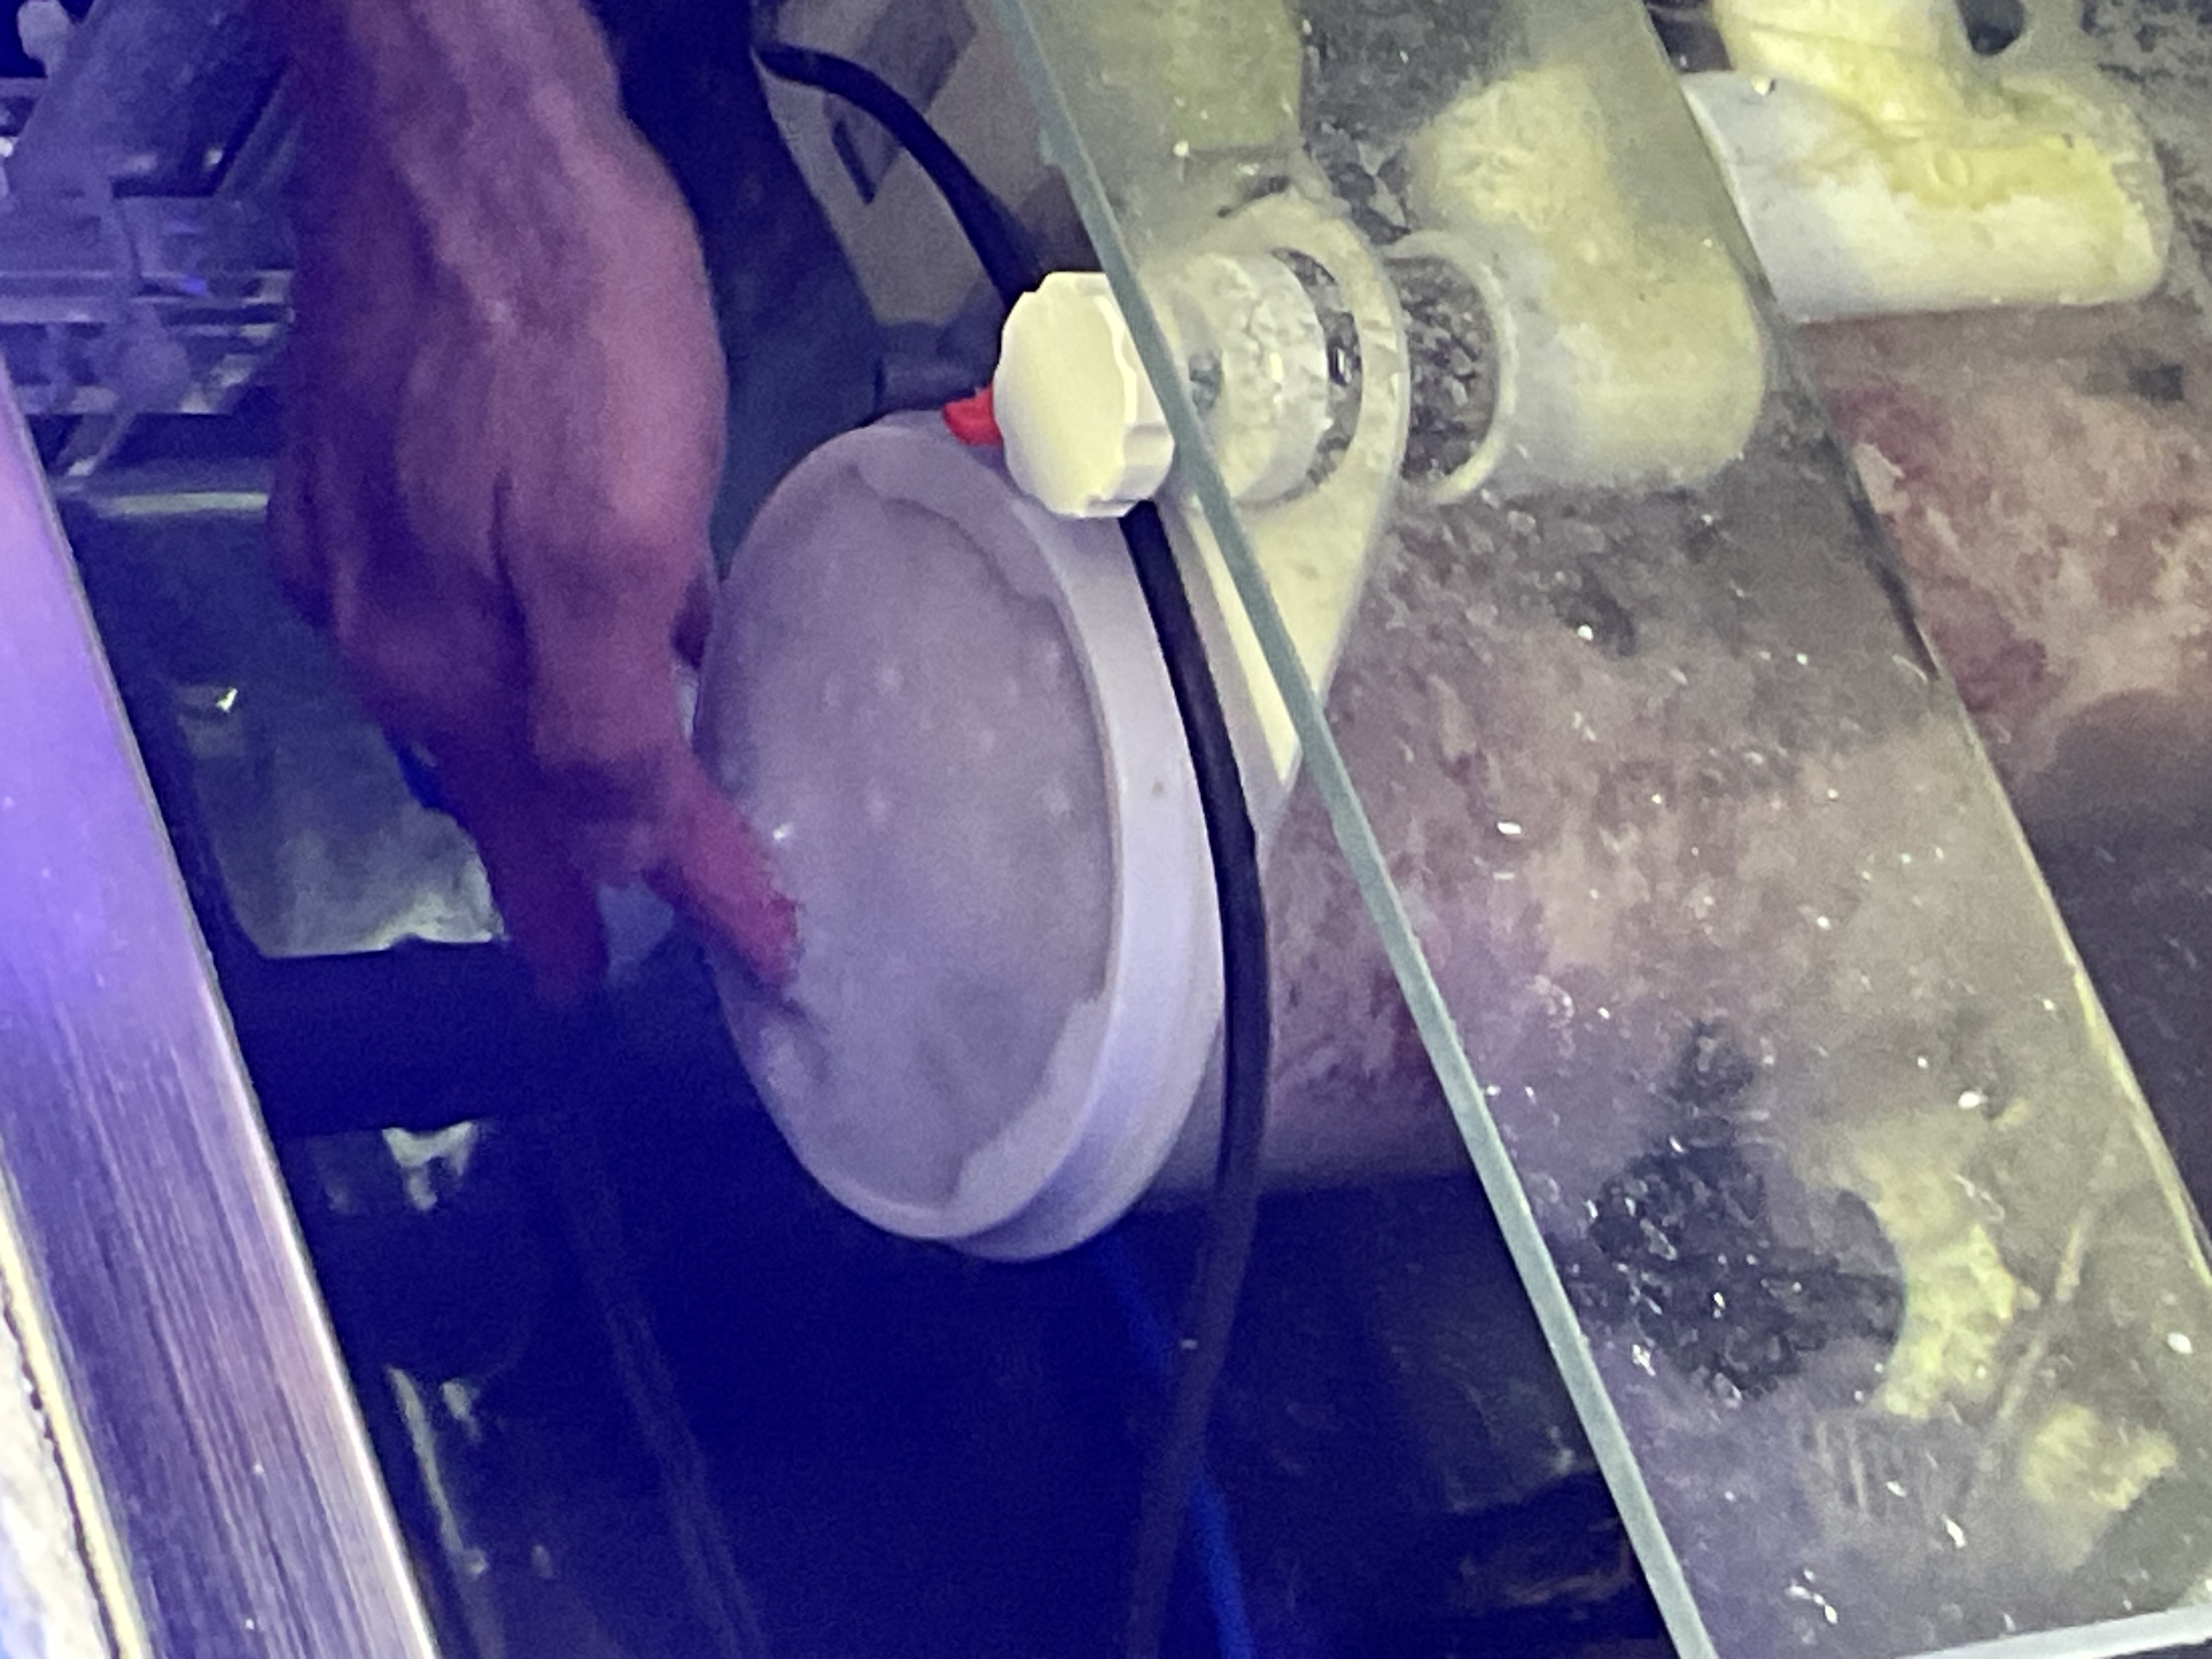
Figure 8: Clearing salt from the threads.
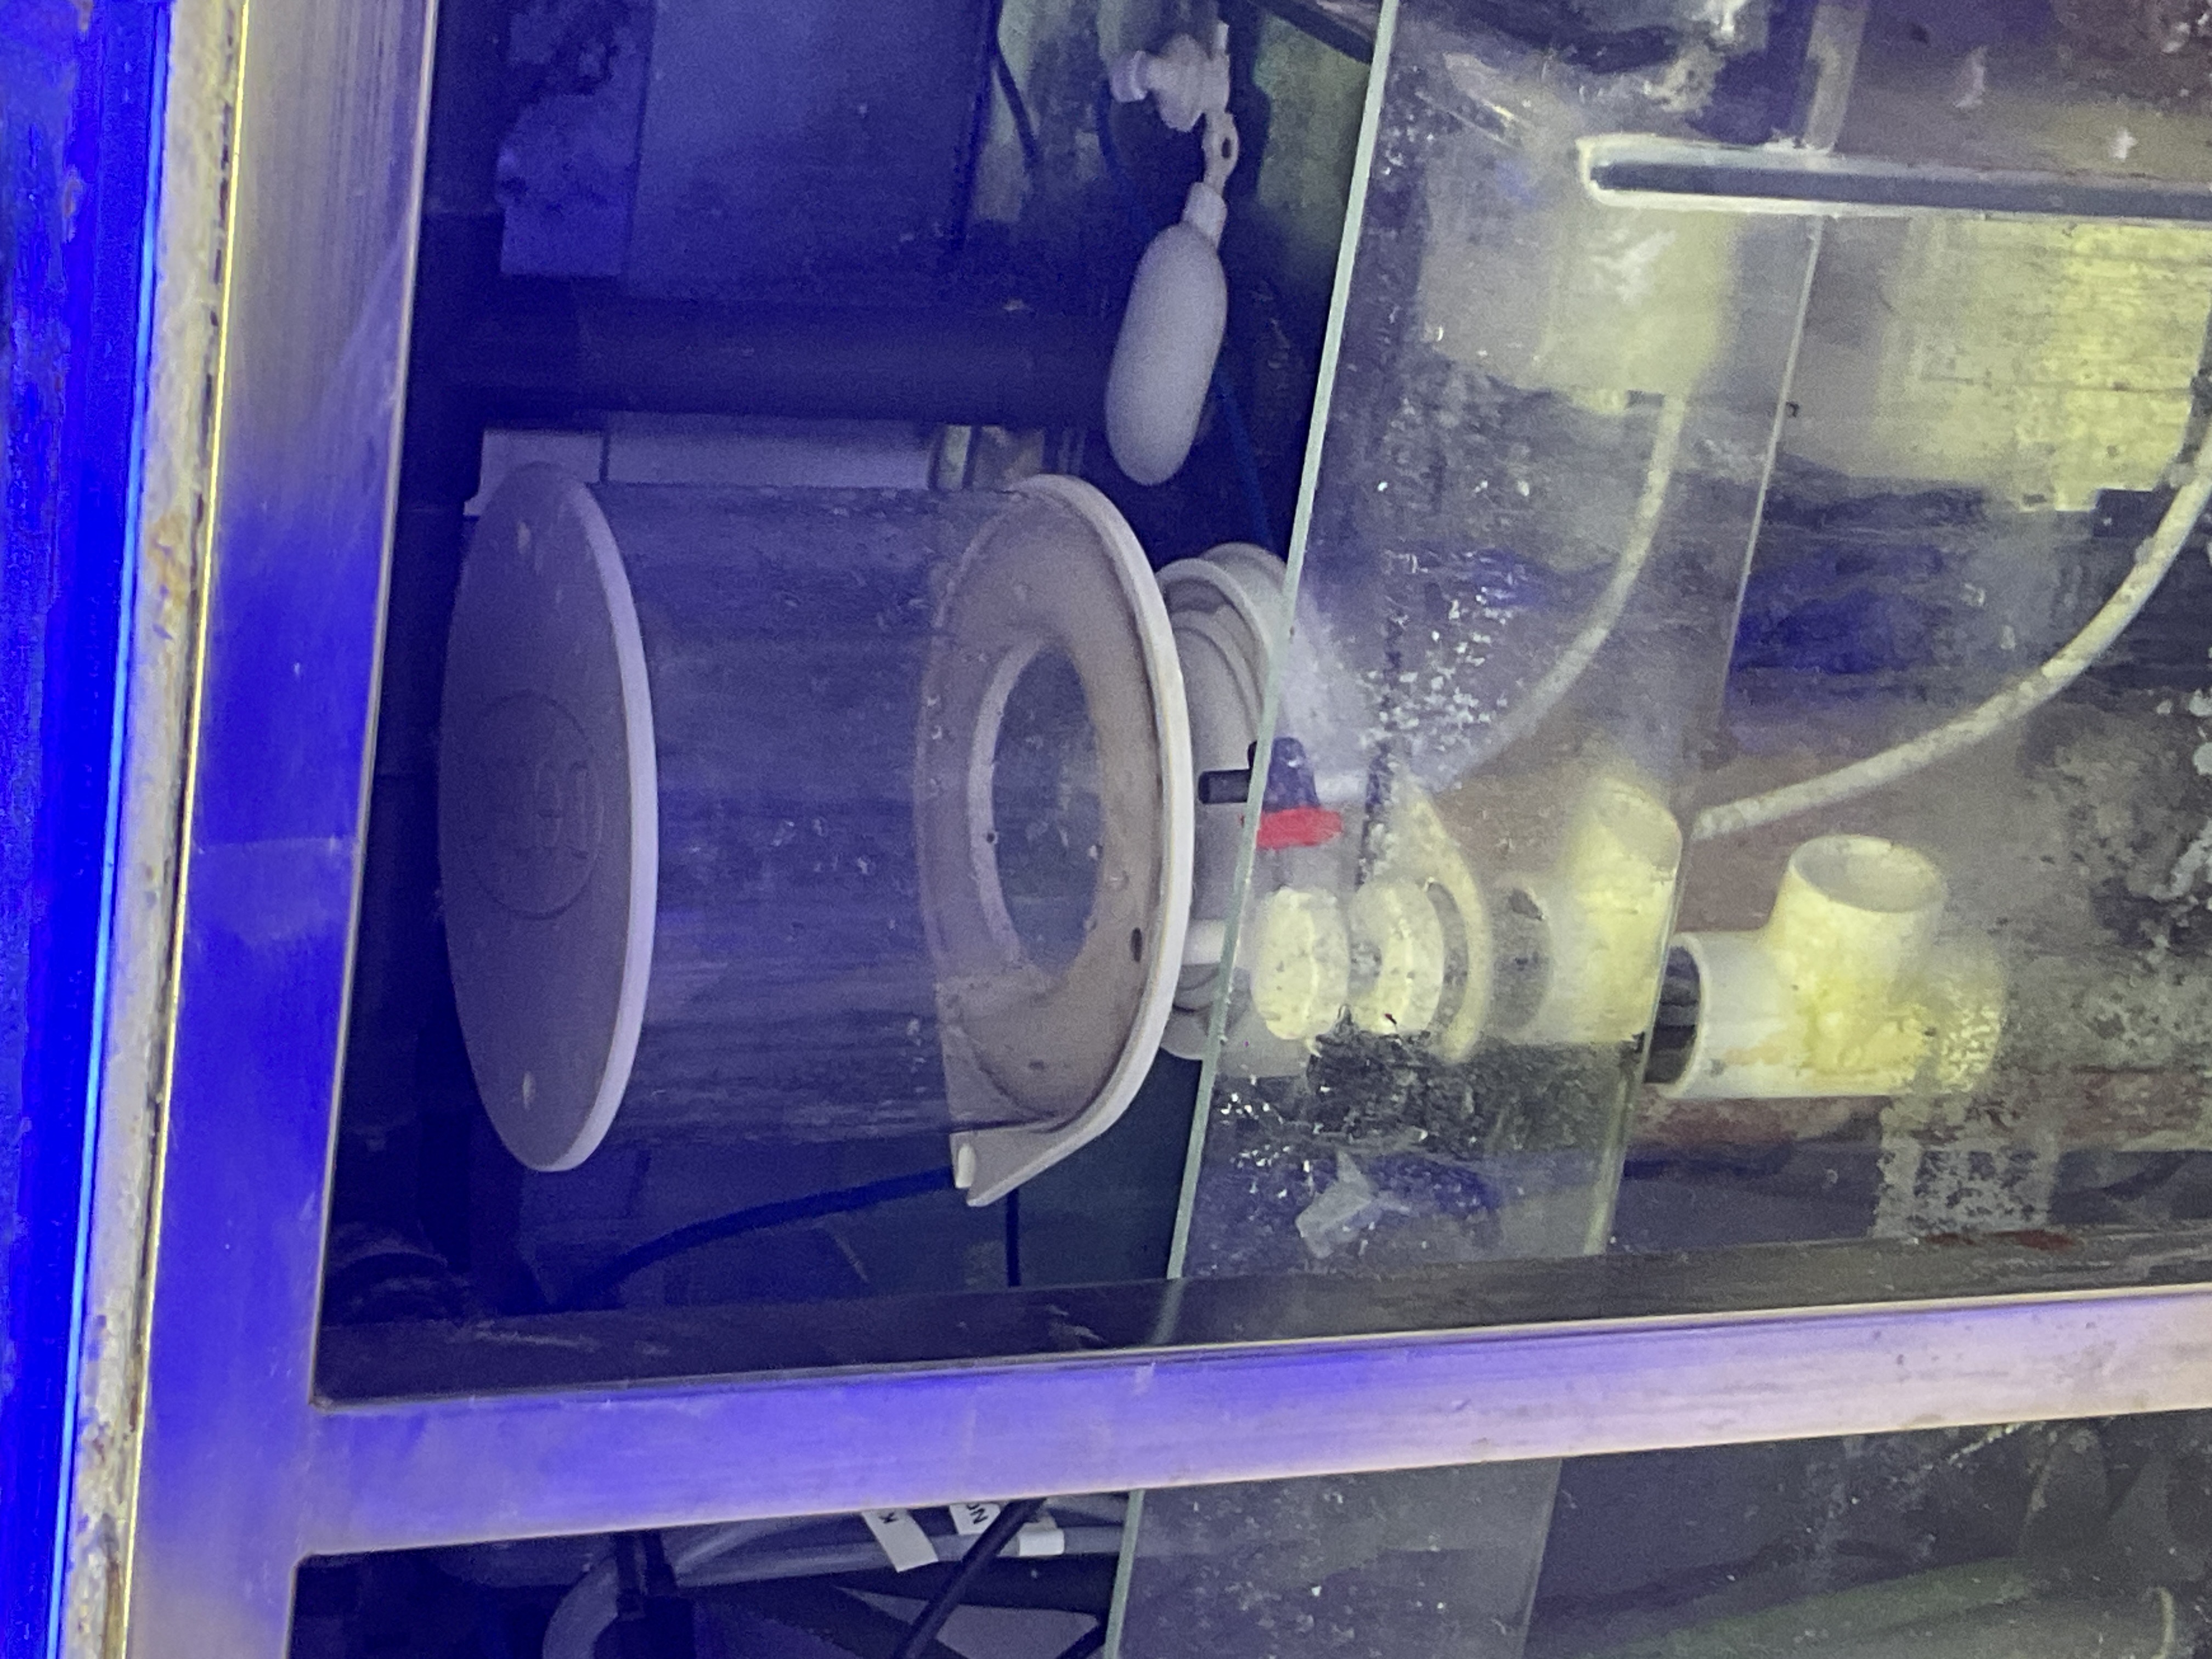
Figure 9: Cleaned protein breaker.
Return the protein breaker head to the system by screwing it clockwise. When functioning correctly, there should be bubbles rising to about halfway up the protein breaker head (with the sump pump turned on, check after the water change). Additionally, there is a small soft air intake at the bottom of the protein breaker head which can occasionally become clogged with salt. A small squeeze and a squirt of DDW water will fix this issue.
Step 4: Water Removal
Take the saltwater tube from the sink area.
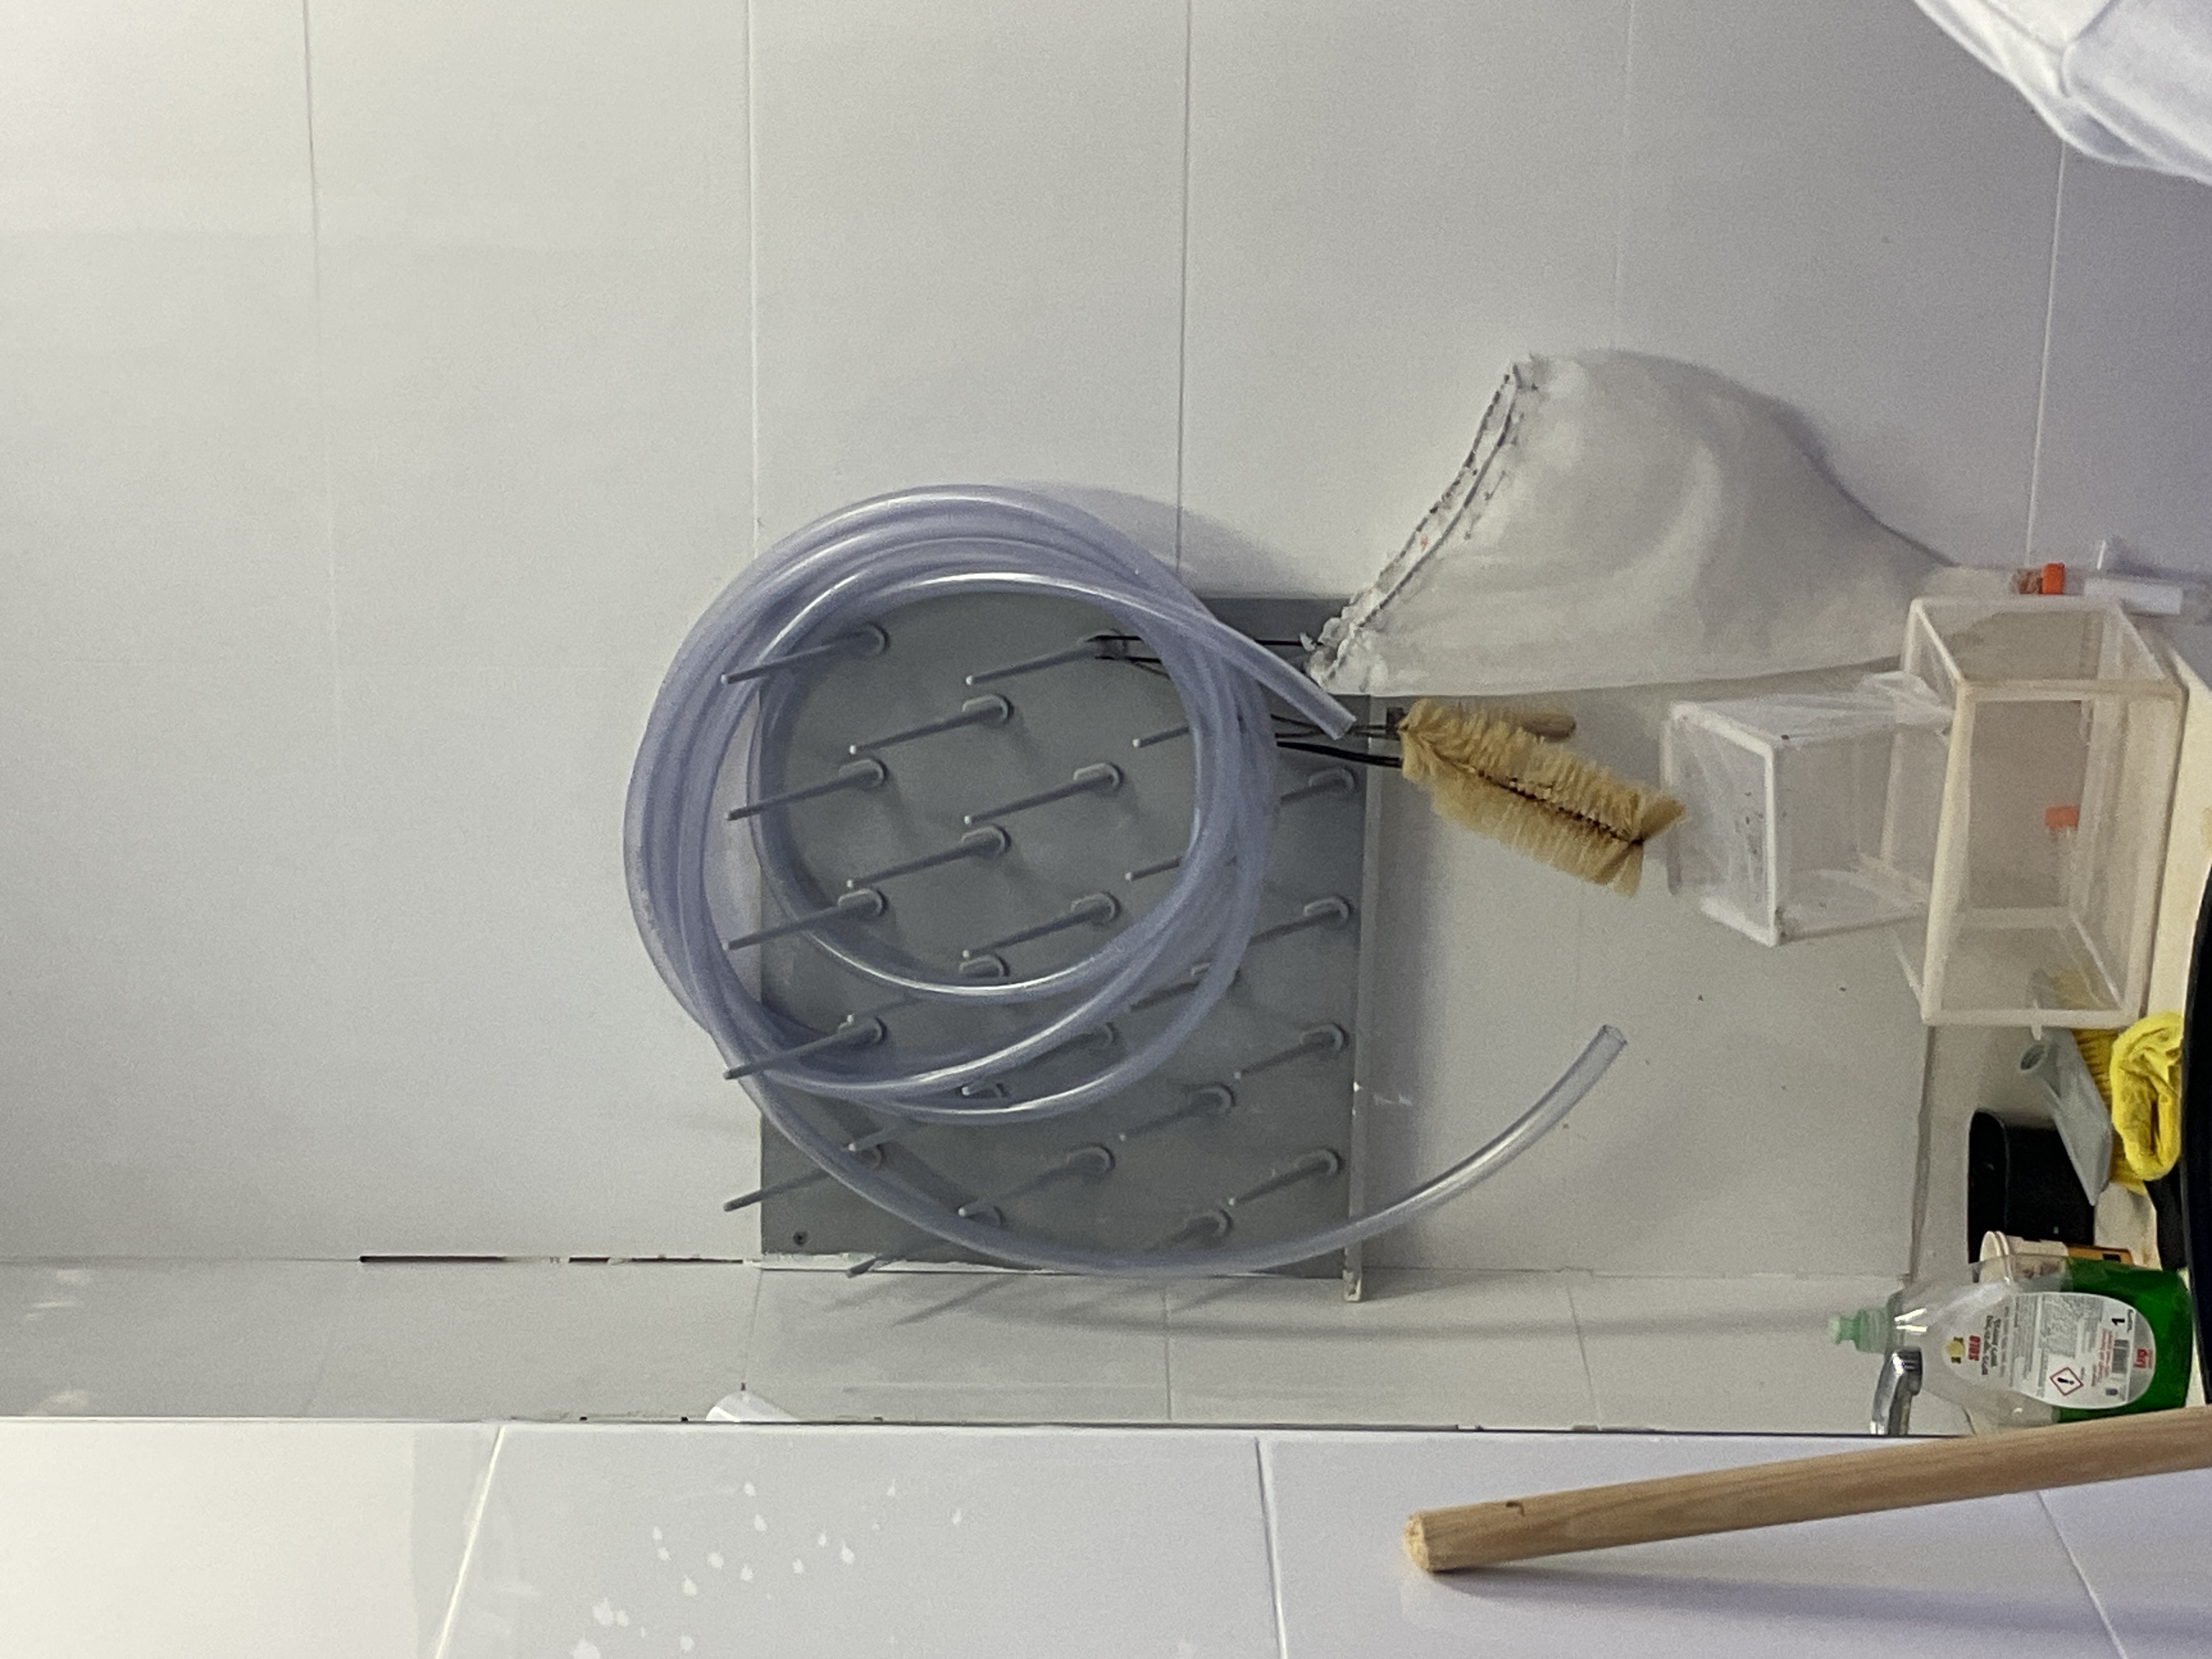
Figure 10: Saltwater tube.
Important: Insert one end of the tube at least half a meter into the drainage hole to ensure the tube does not become removed from the drain while water is running through it, which can cause a flood.
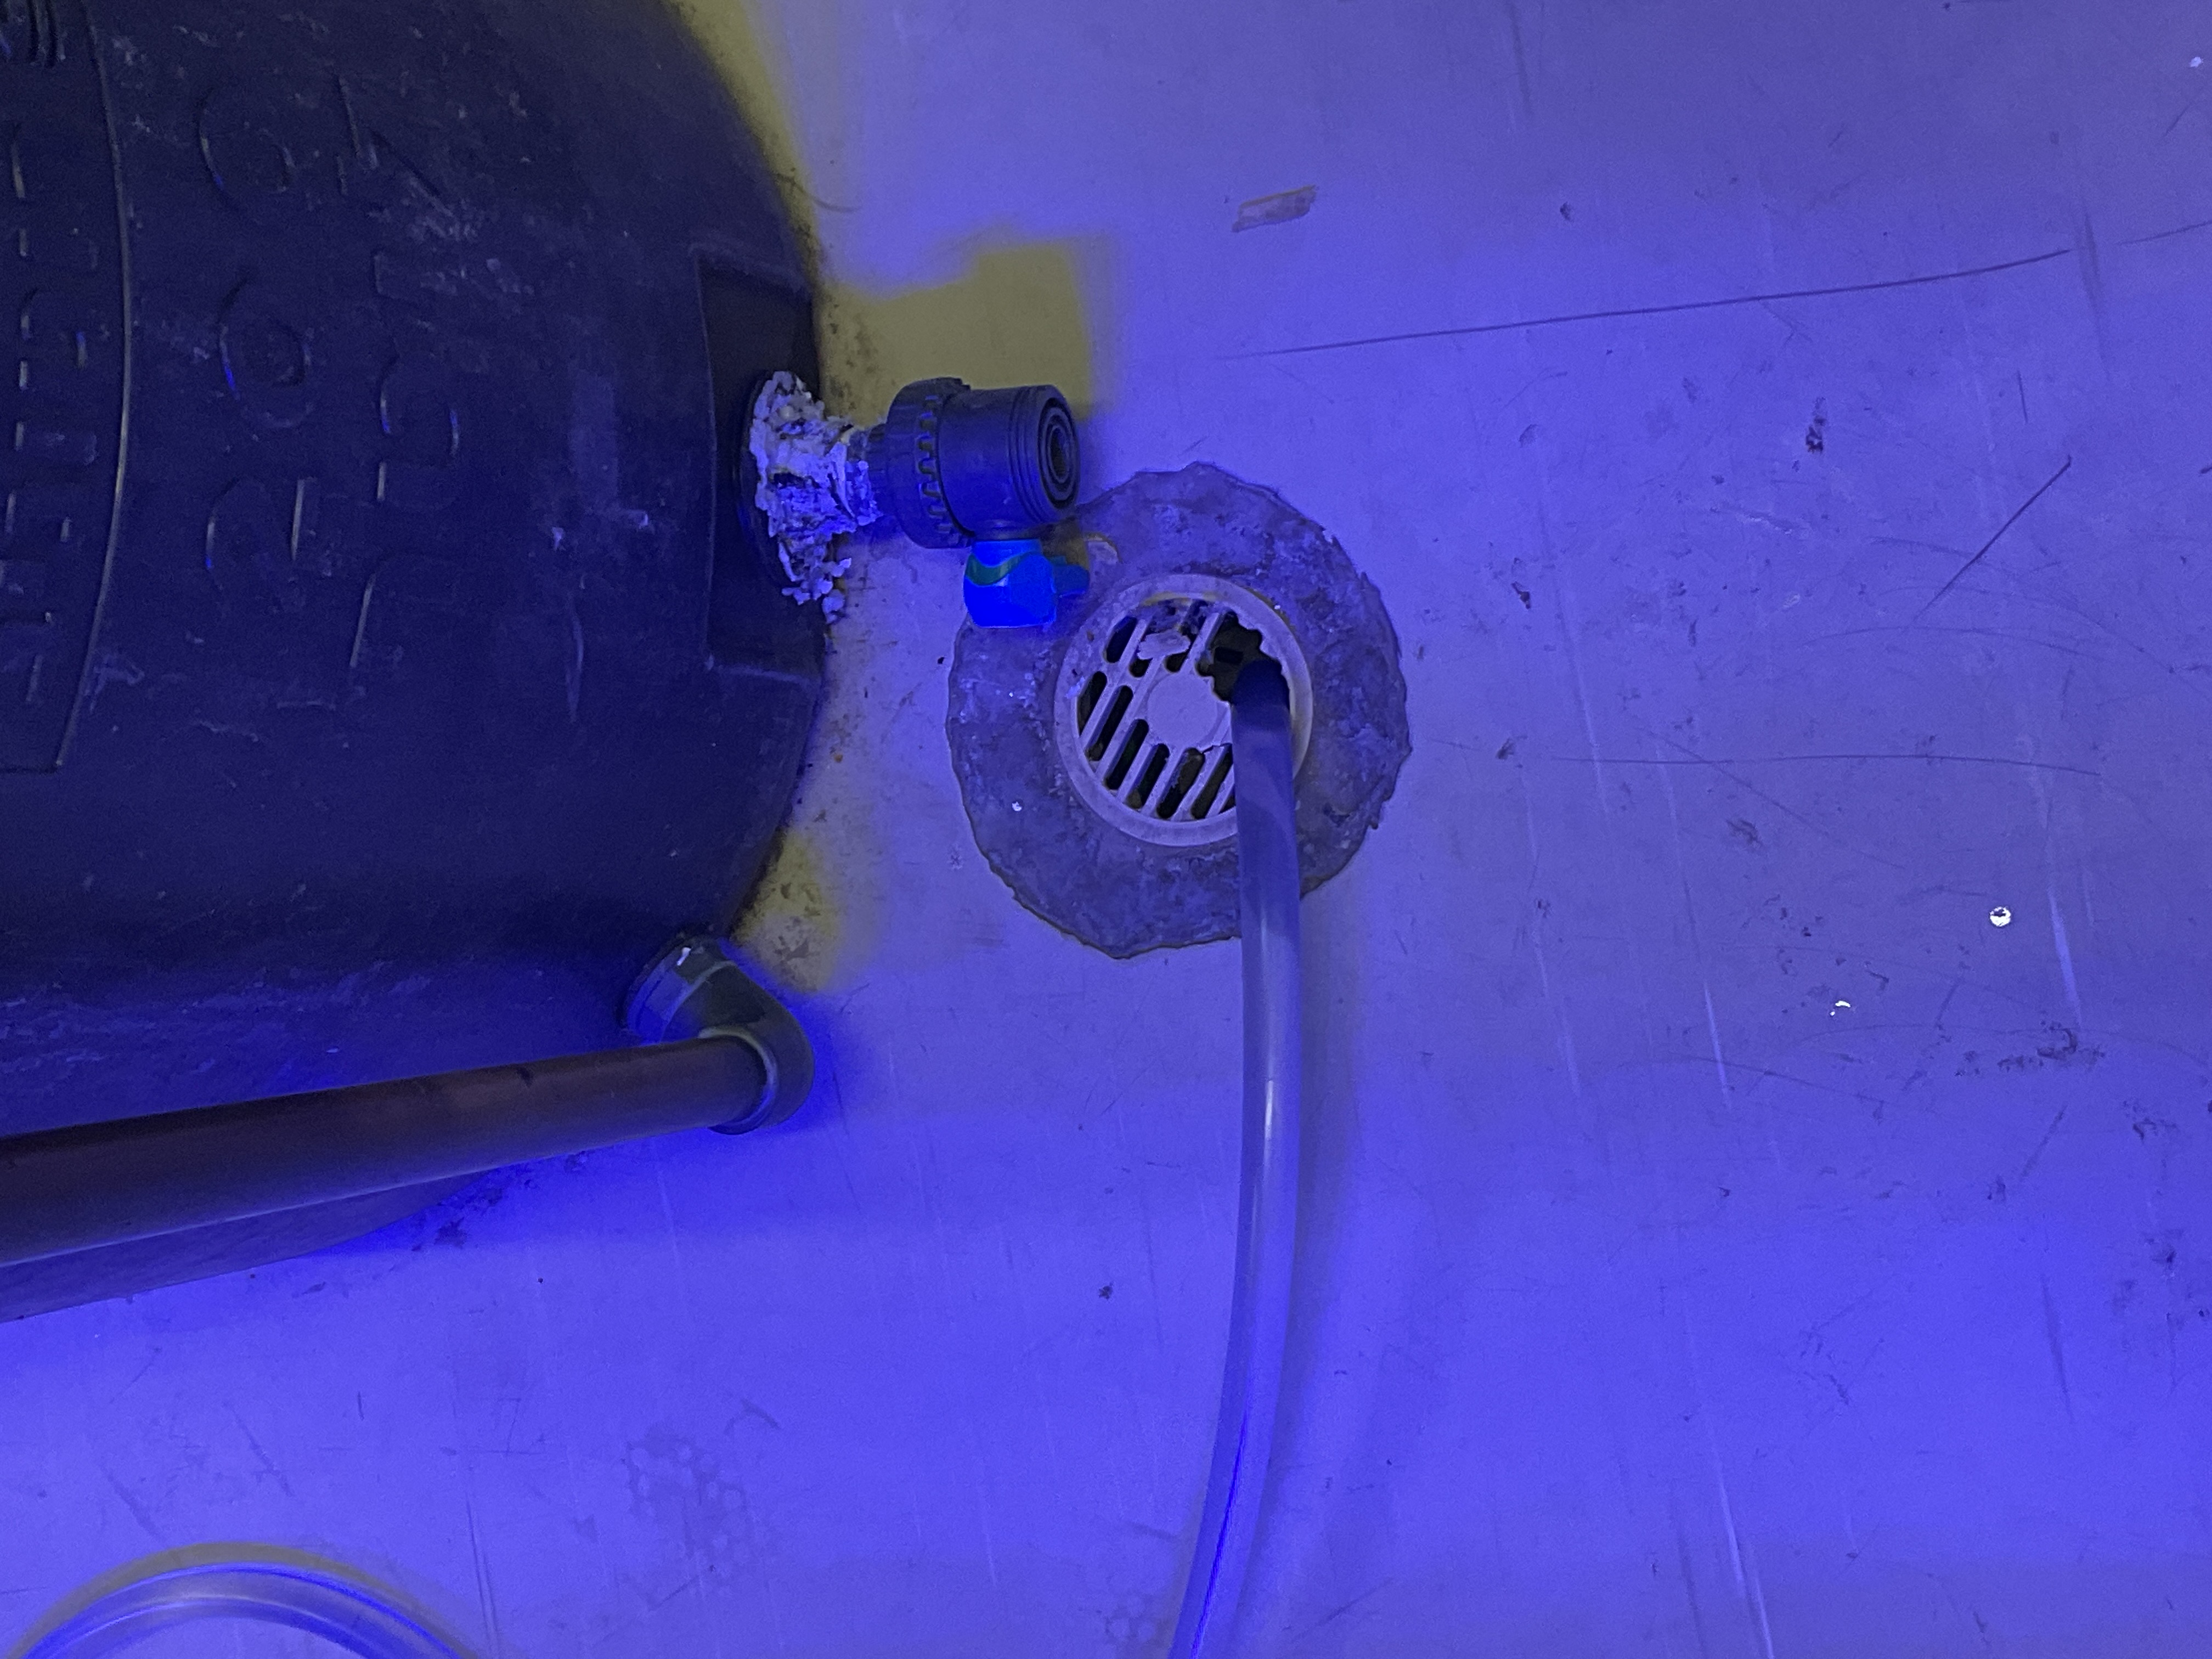
Figure 11: Drain with tube secured in it.
To perform an ~20% water change in a system, vacuum water from the overflow level to the bottom of the overflow container.
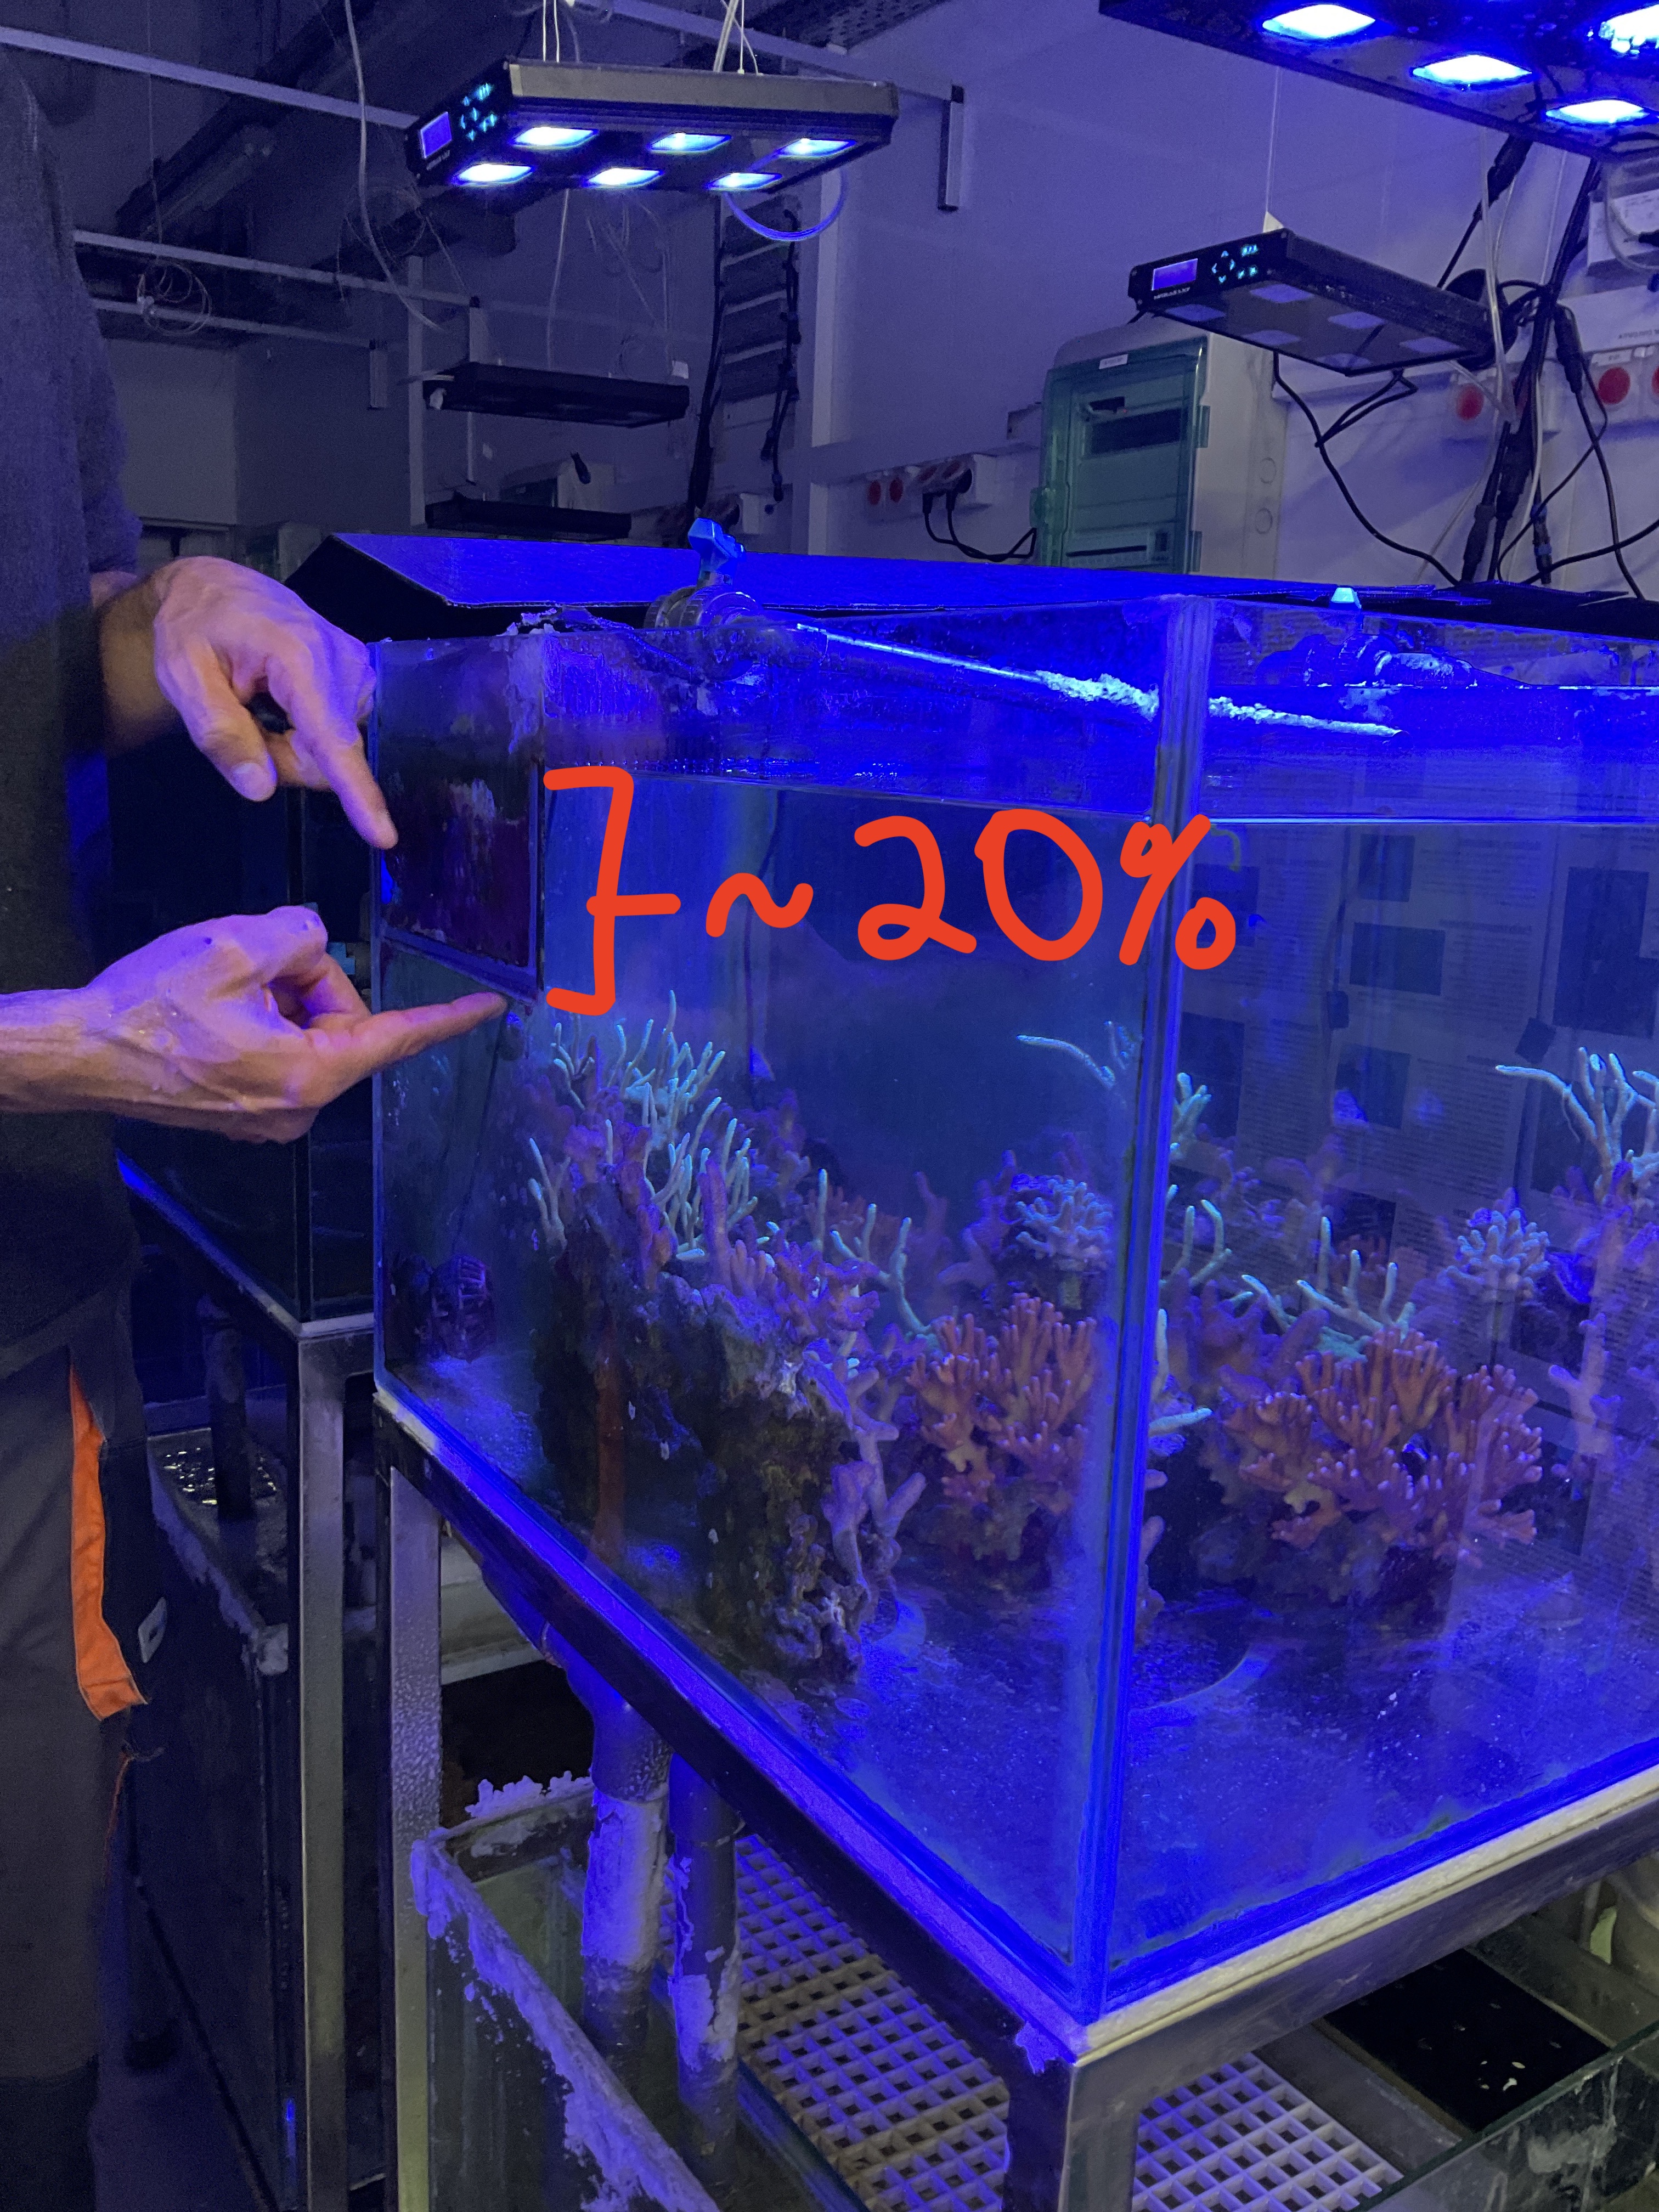
Figure 12: Water change levels.
To start the vacuum of water, there are two methods. One method is to briefly turn on the sump and use the flow from the pump in the tank to start the vacuum before turning off the sump. Another method is to begin the vacuum by breathing in the air from the exit side of the tube until the flow begins and quickly return the tube to the drain securely.
Once water is being vacuumed out of the aquarium, remove the debris on the floor of the tank using the tube. Repeat for all three tanks until the water level has dropped to the bottom of the overflow container. Remove the tube from the water and allow the remaining water in the tube to flow into the drain. Note: If performing a water change solo, the use of a u shaped tube extender can make it easier to secure the tube in the aquarium while needing to be in another area.
Step 5: Water Addition
Check the salinity of the aquarium and the saltwater reservoir barrel with the WTW salinity probe (black probe is salinity, the blue is for pH). It’s important to do this before adding water to your aquarium from the reservoir barrel.
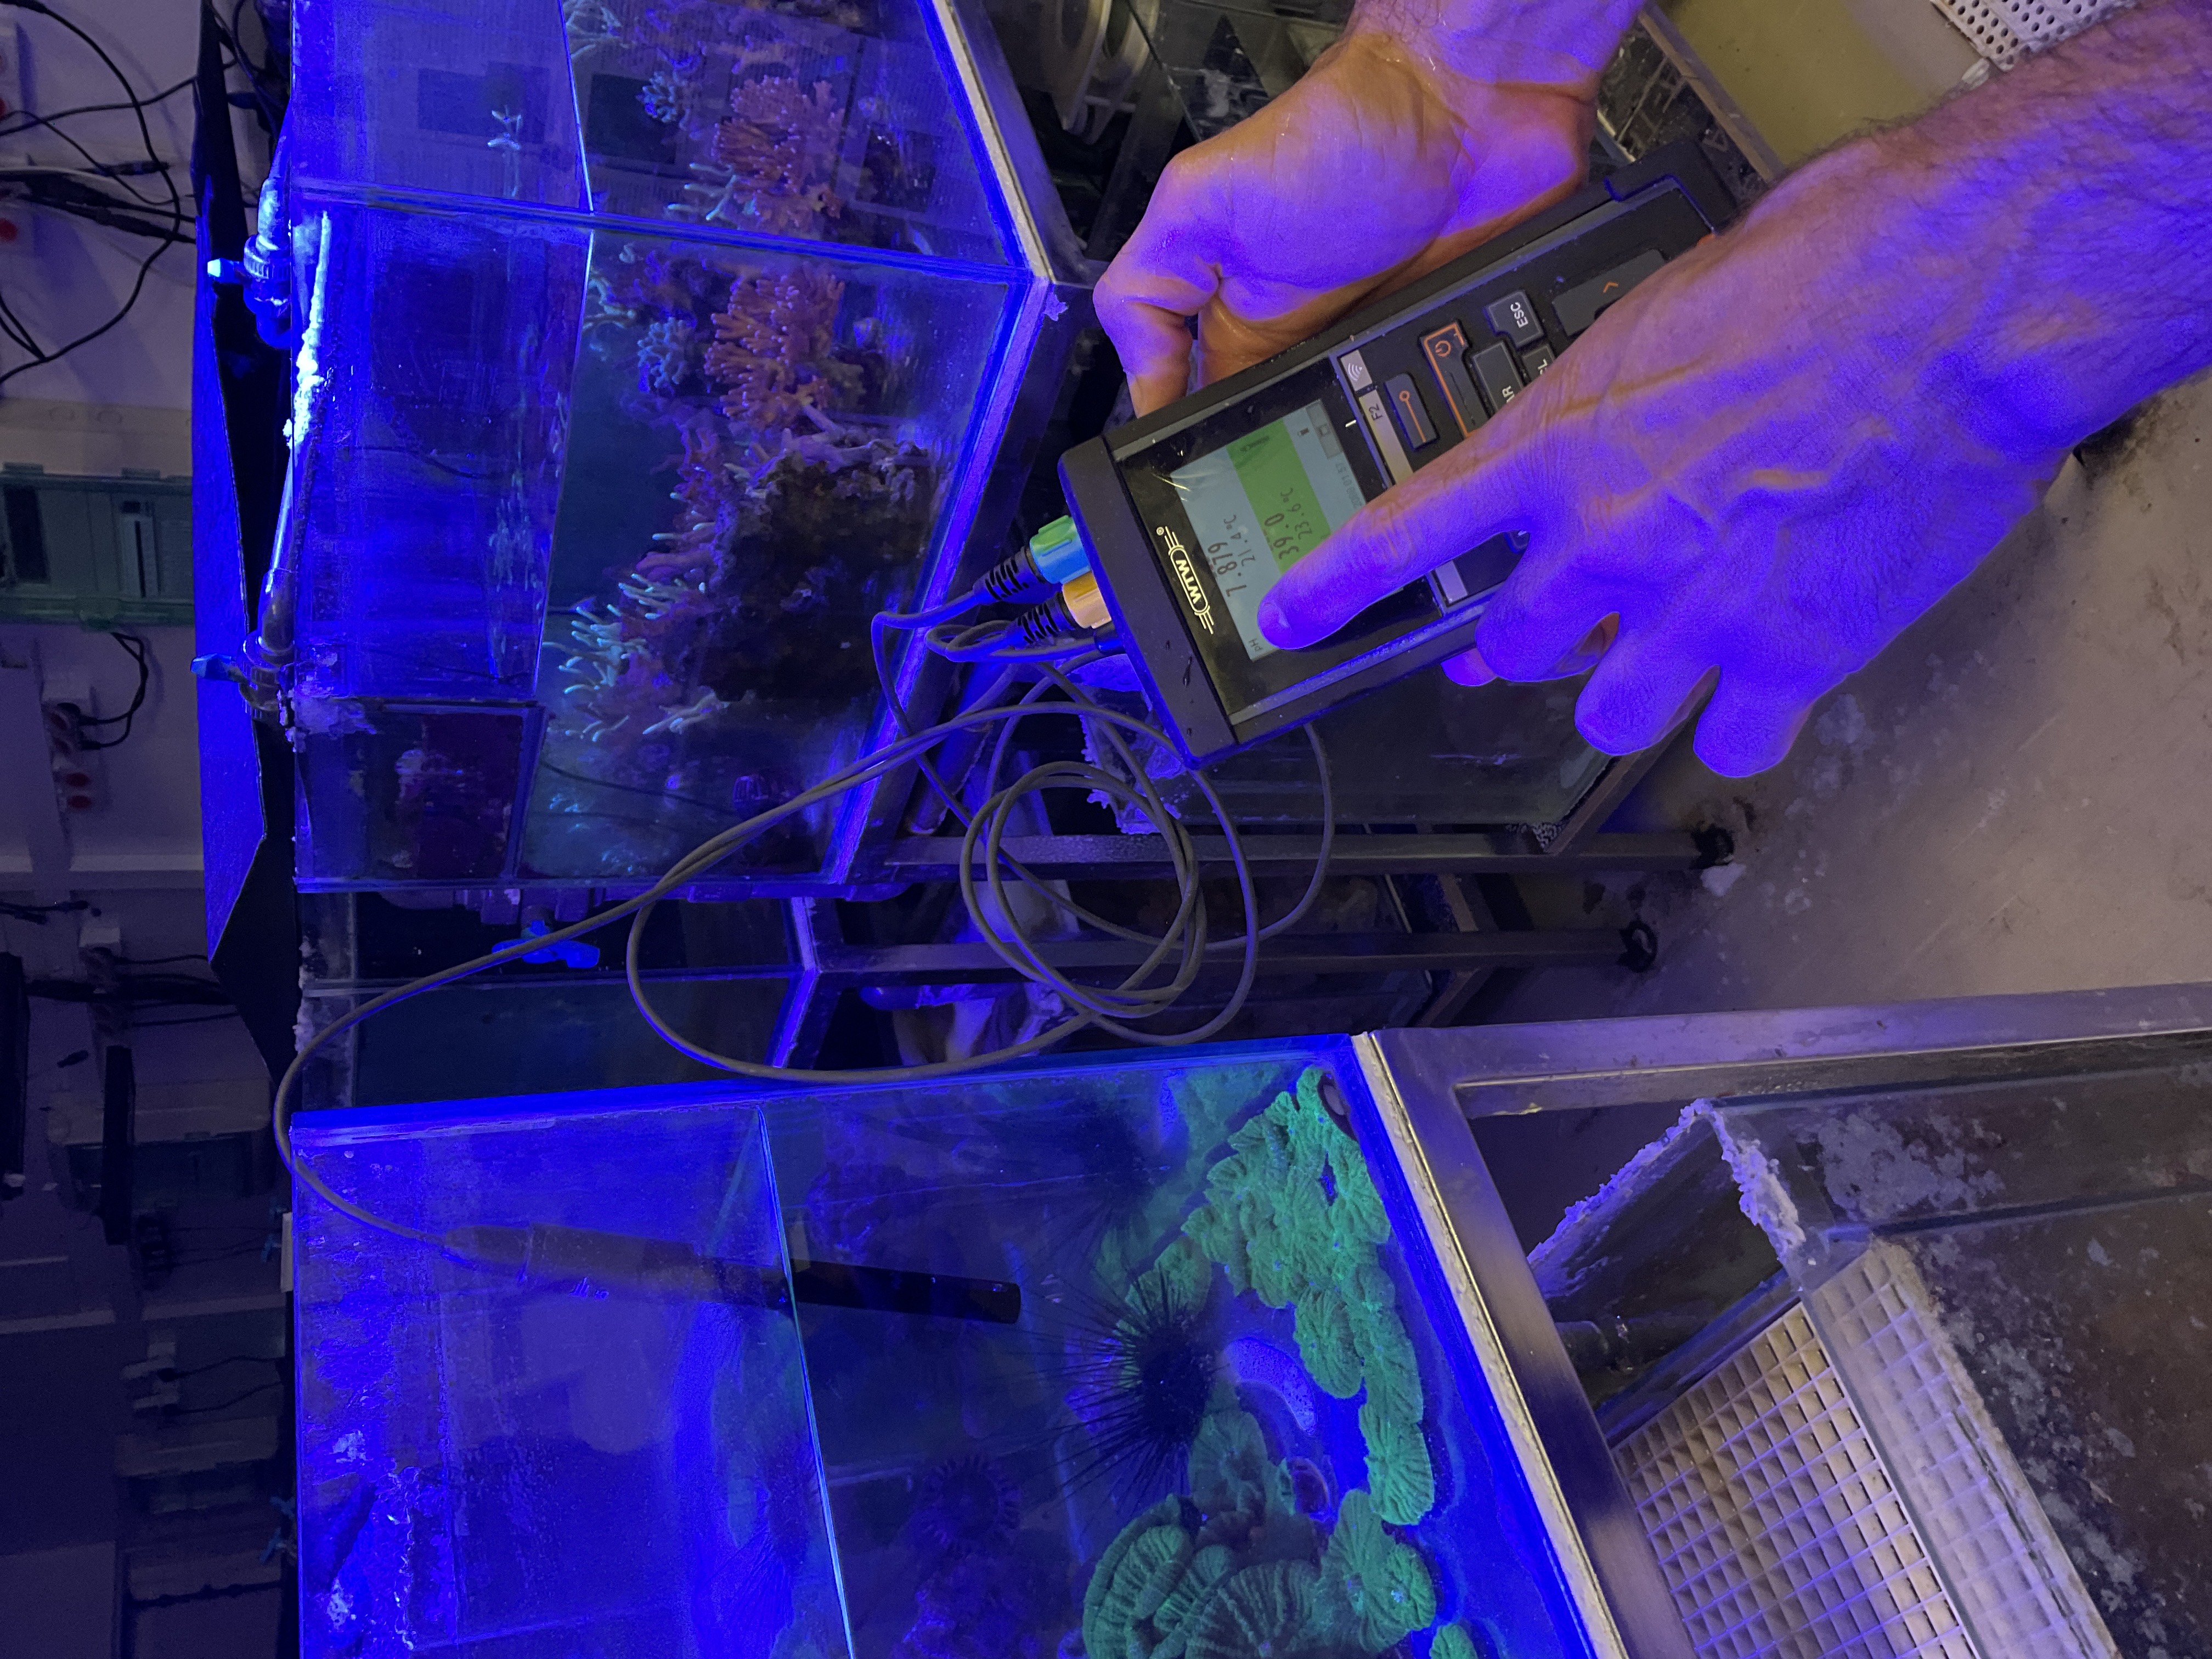
Figure 13: Salinity check with WTW probe.
Note: In general, the tanks in the aquarium room are kept around 39-40 PPM. If the reservoir barrel salinity is too low, you can add salt to increase salinity. If the reservoir barrel’s salinity is too high, adding DDW water will reduce the salinity, but make sure to use the freshwater tube.
Once the salinity of the reservoir is the correct level, connect the saltwater tube to the barbed tube located on the top of the barrel.
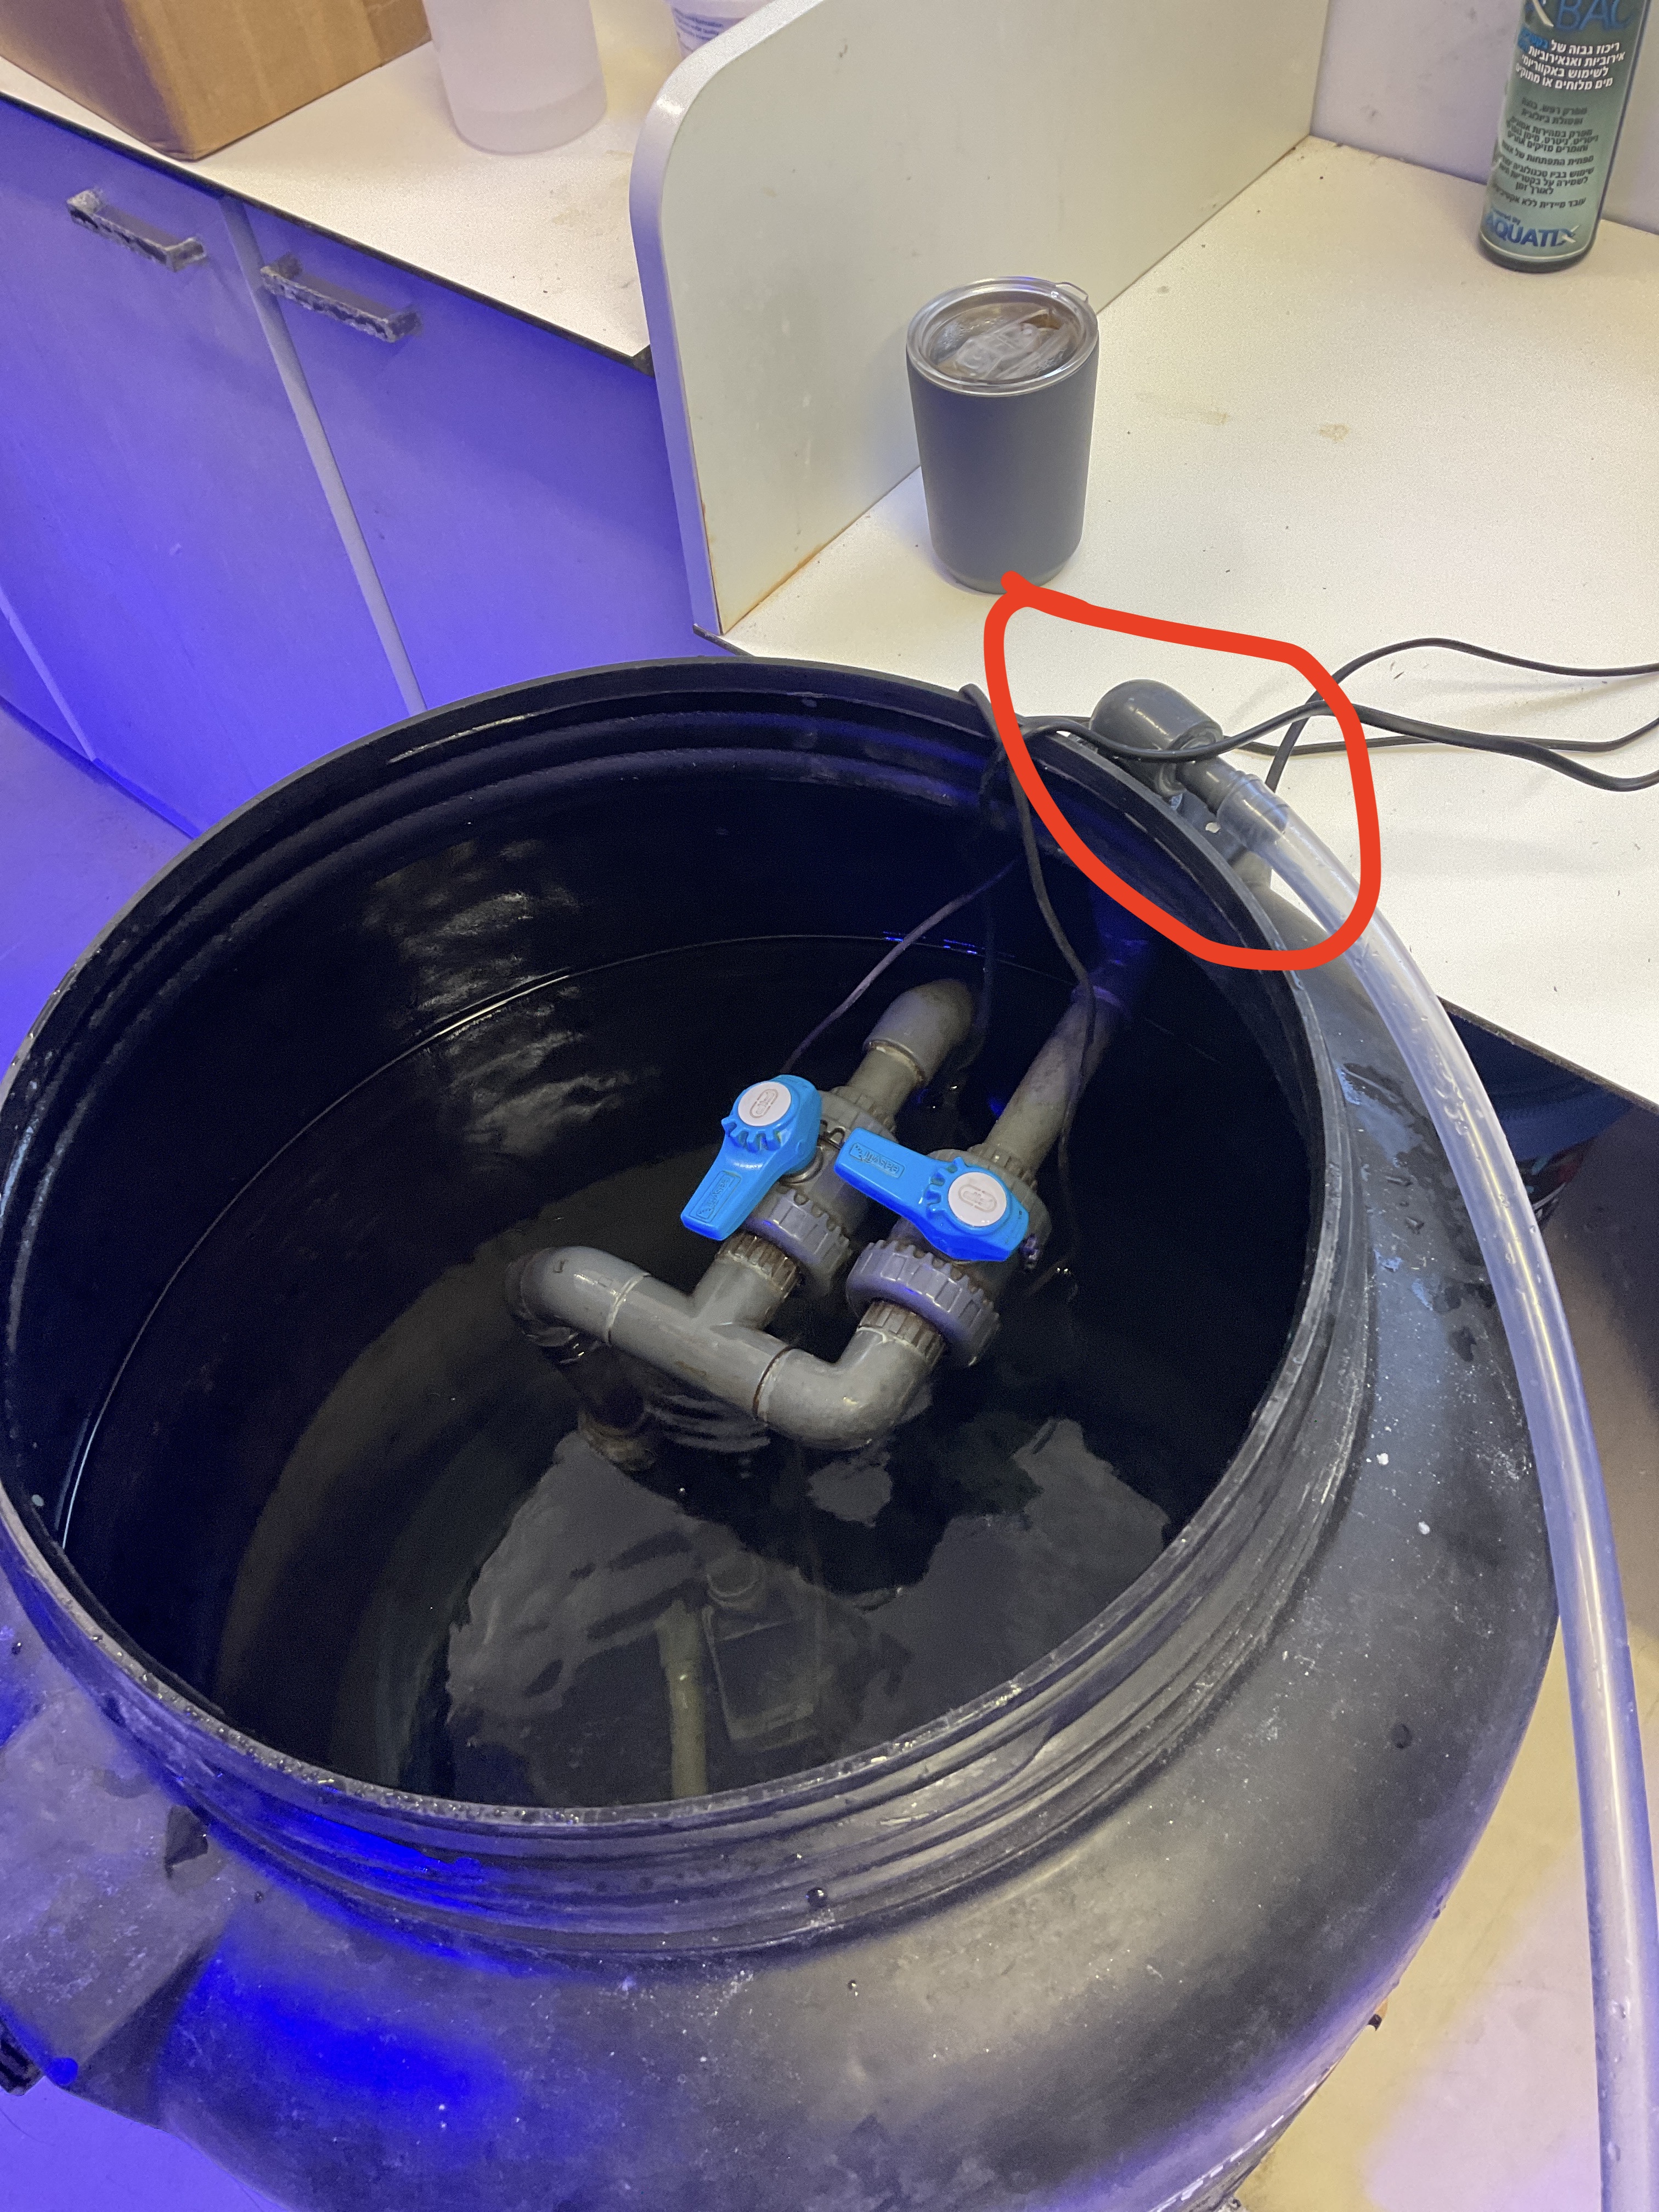
Figure 14: Connecting tube to the barbed connector.
Notice that there are two valves on the top of the barrel. The one on the left connects to a pump that mixes the water, while the pump on the right is responsible for pumping water out of the barrel. When the valve is parallel to the tube, the flow is open, and when the valve is perpendicular to the tube, it is closed.
To begin the flow of water through the tube, turn the water mixer valve off and the water pump on. Make sure to connect the saltwater tube to the barbed connecter before turning on the flow to avoid water spraying out of the connecter.
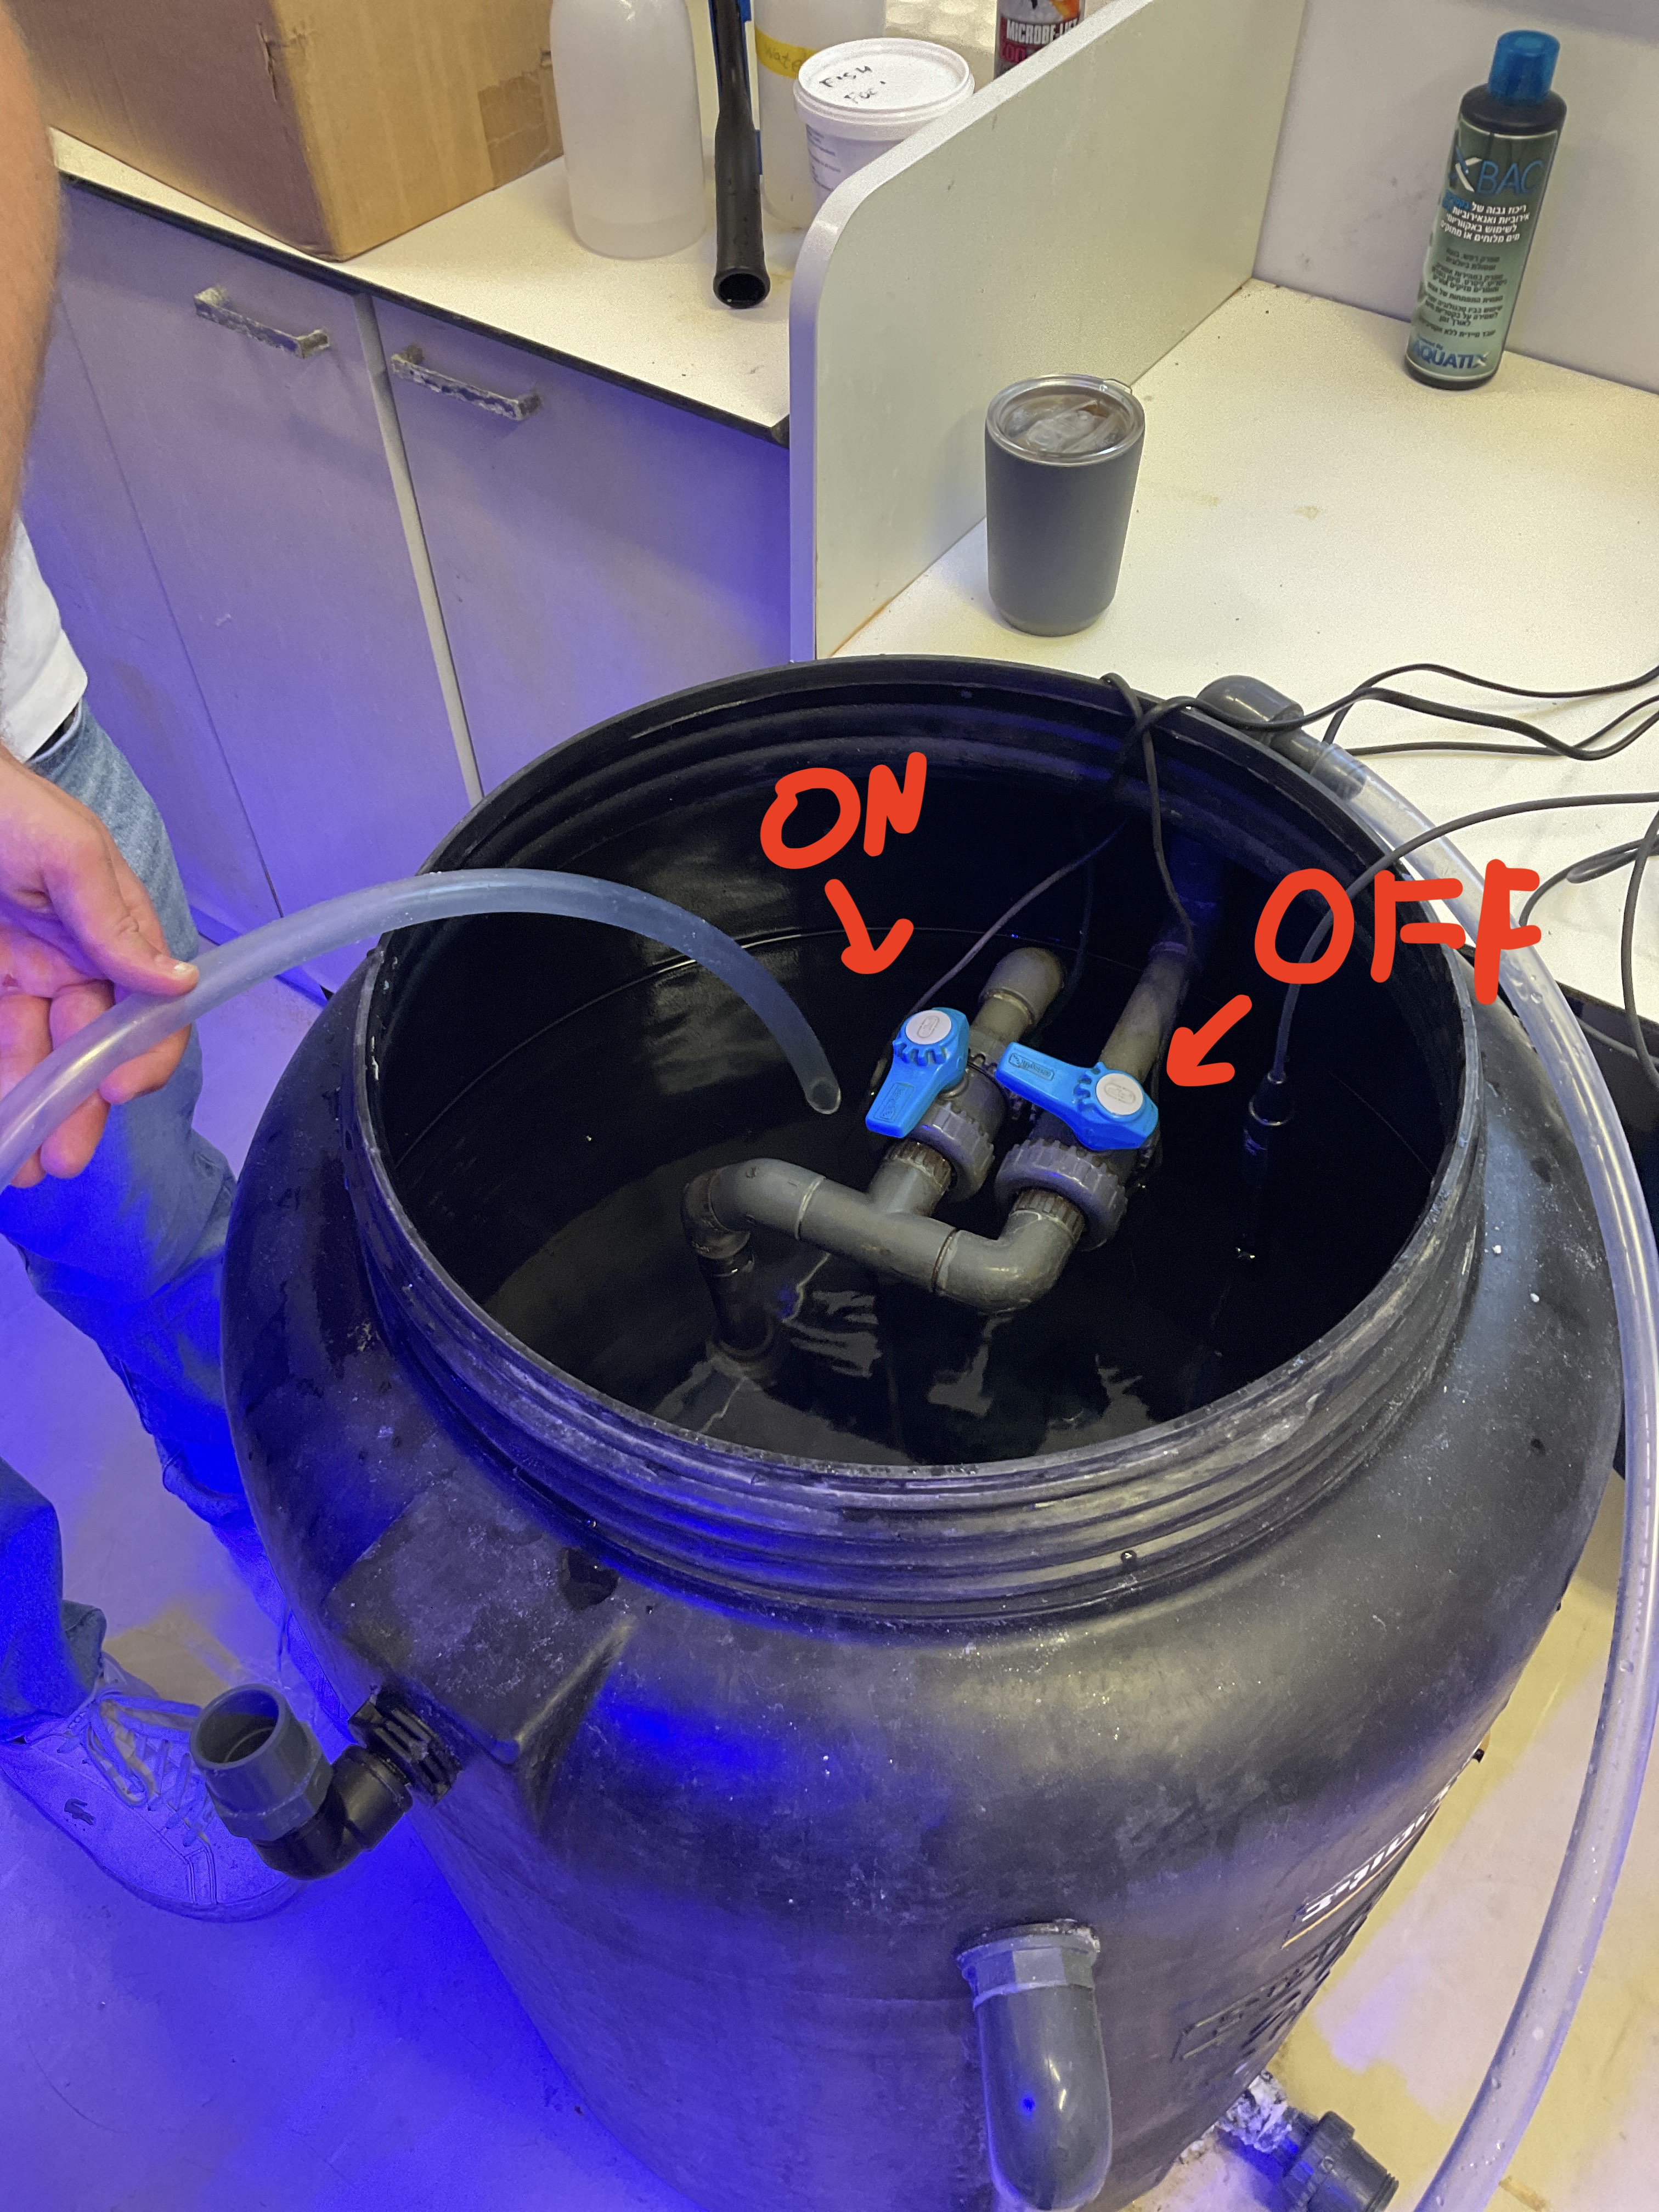
Figure 15: Adjusting the water mixer valve.
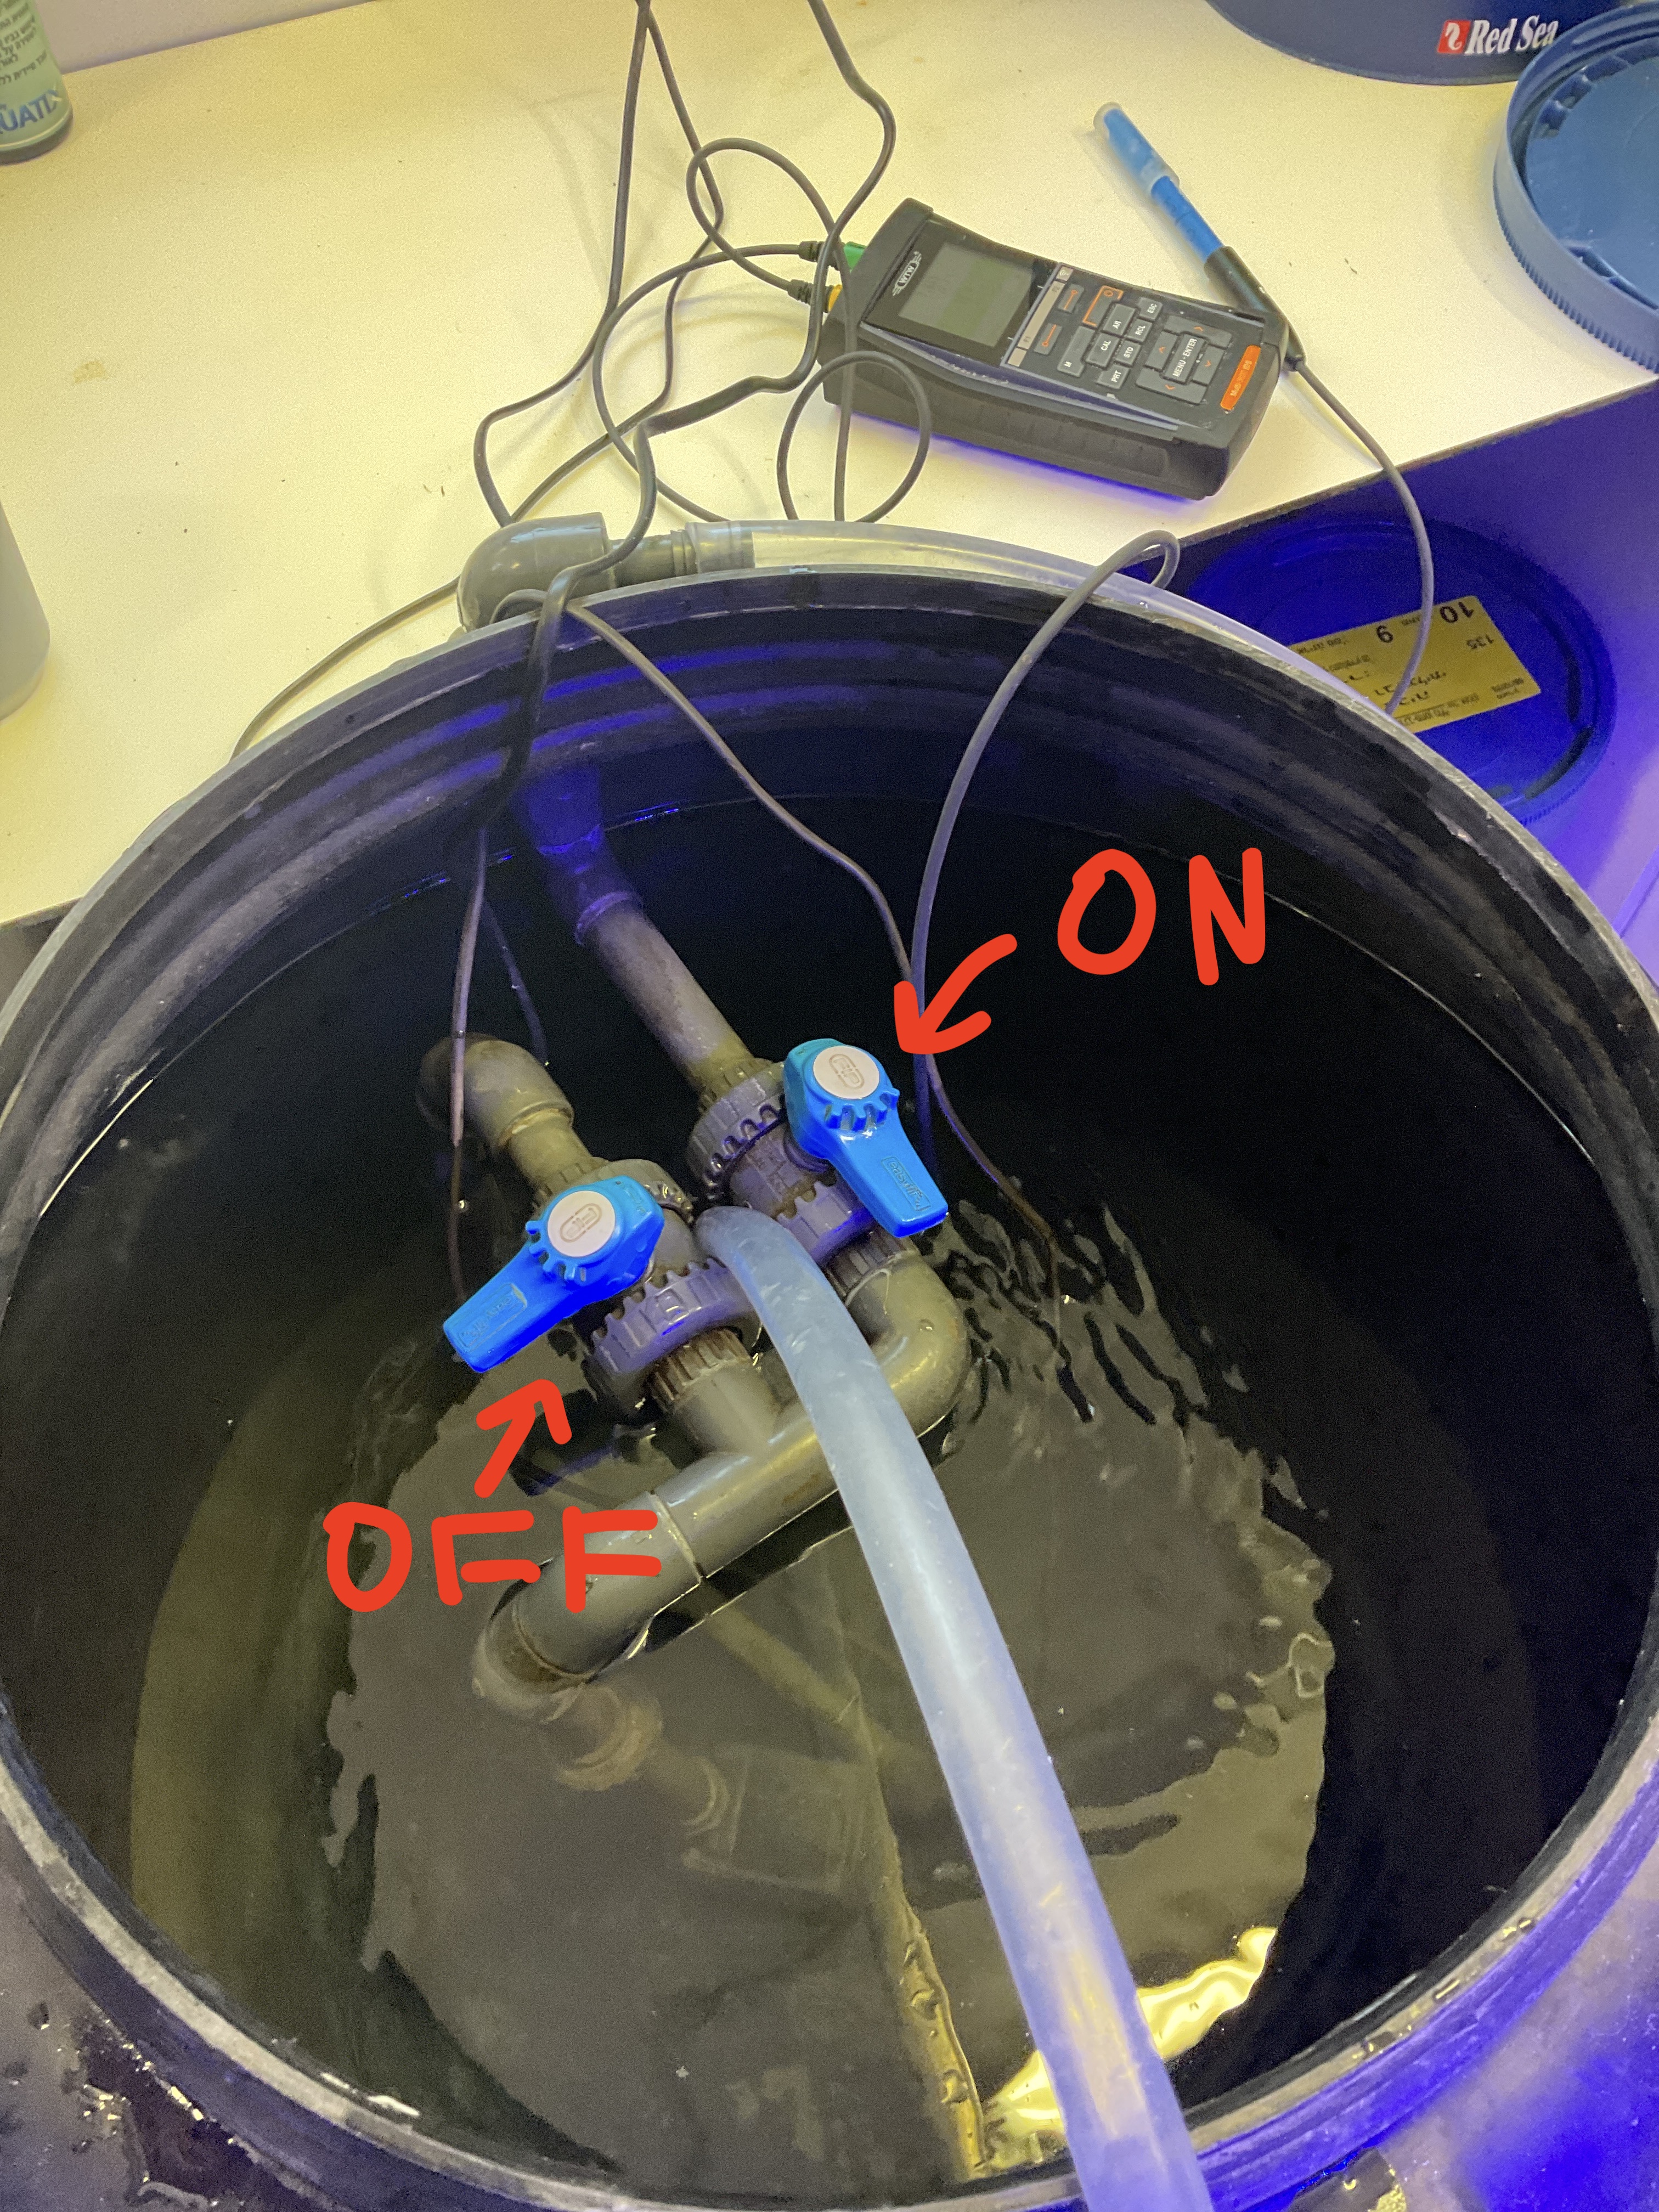
Figure 16: Turning the water pump on.
Fill the tanks until they reach the overflow level in each tank, then turn off the flow from the water pump valve in the barrel.
Step 6: Reservoir Barrel Replenishment
Once you have finished adding water to your tanks from the reservoir, it is important to refill the reservoir. Take the freshwater tube from on top of the DDW reservoir. Using both hands, gently connect the tube to the barbed connector of the DDW tank (the connector is a bit fragile).
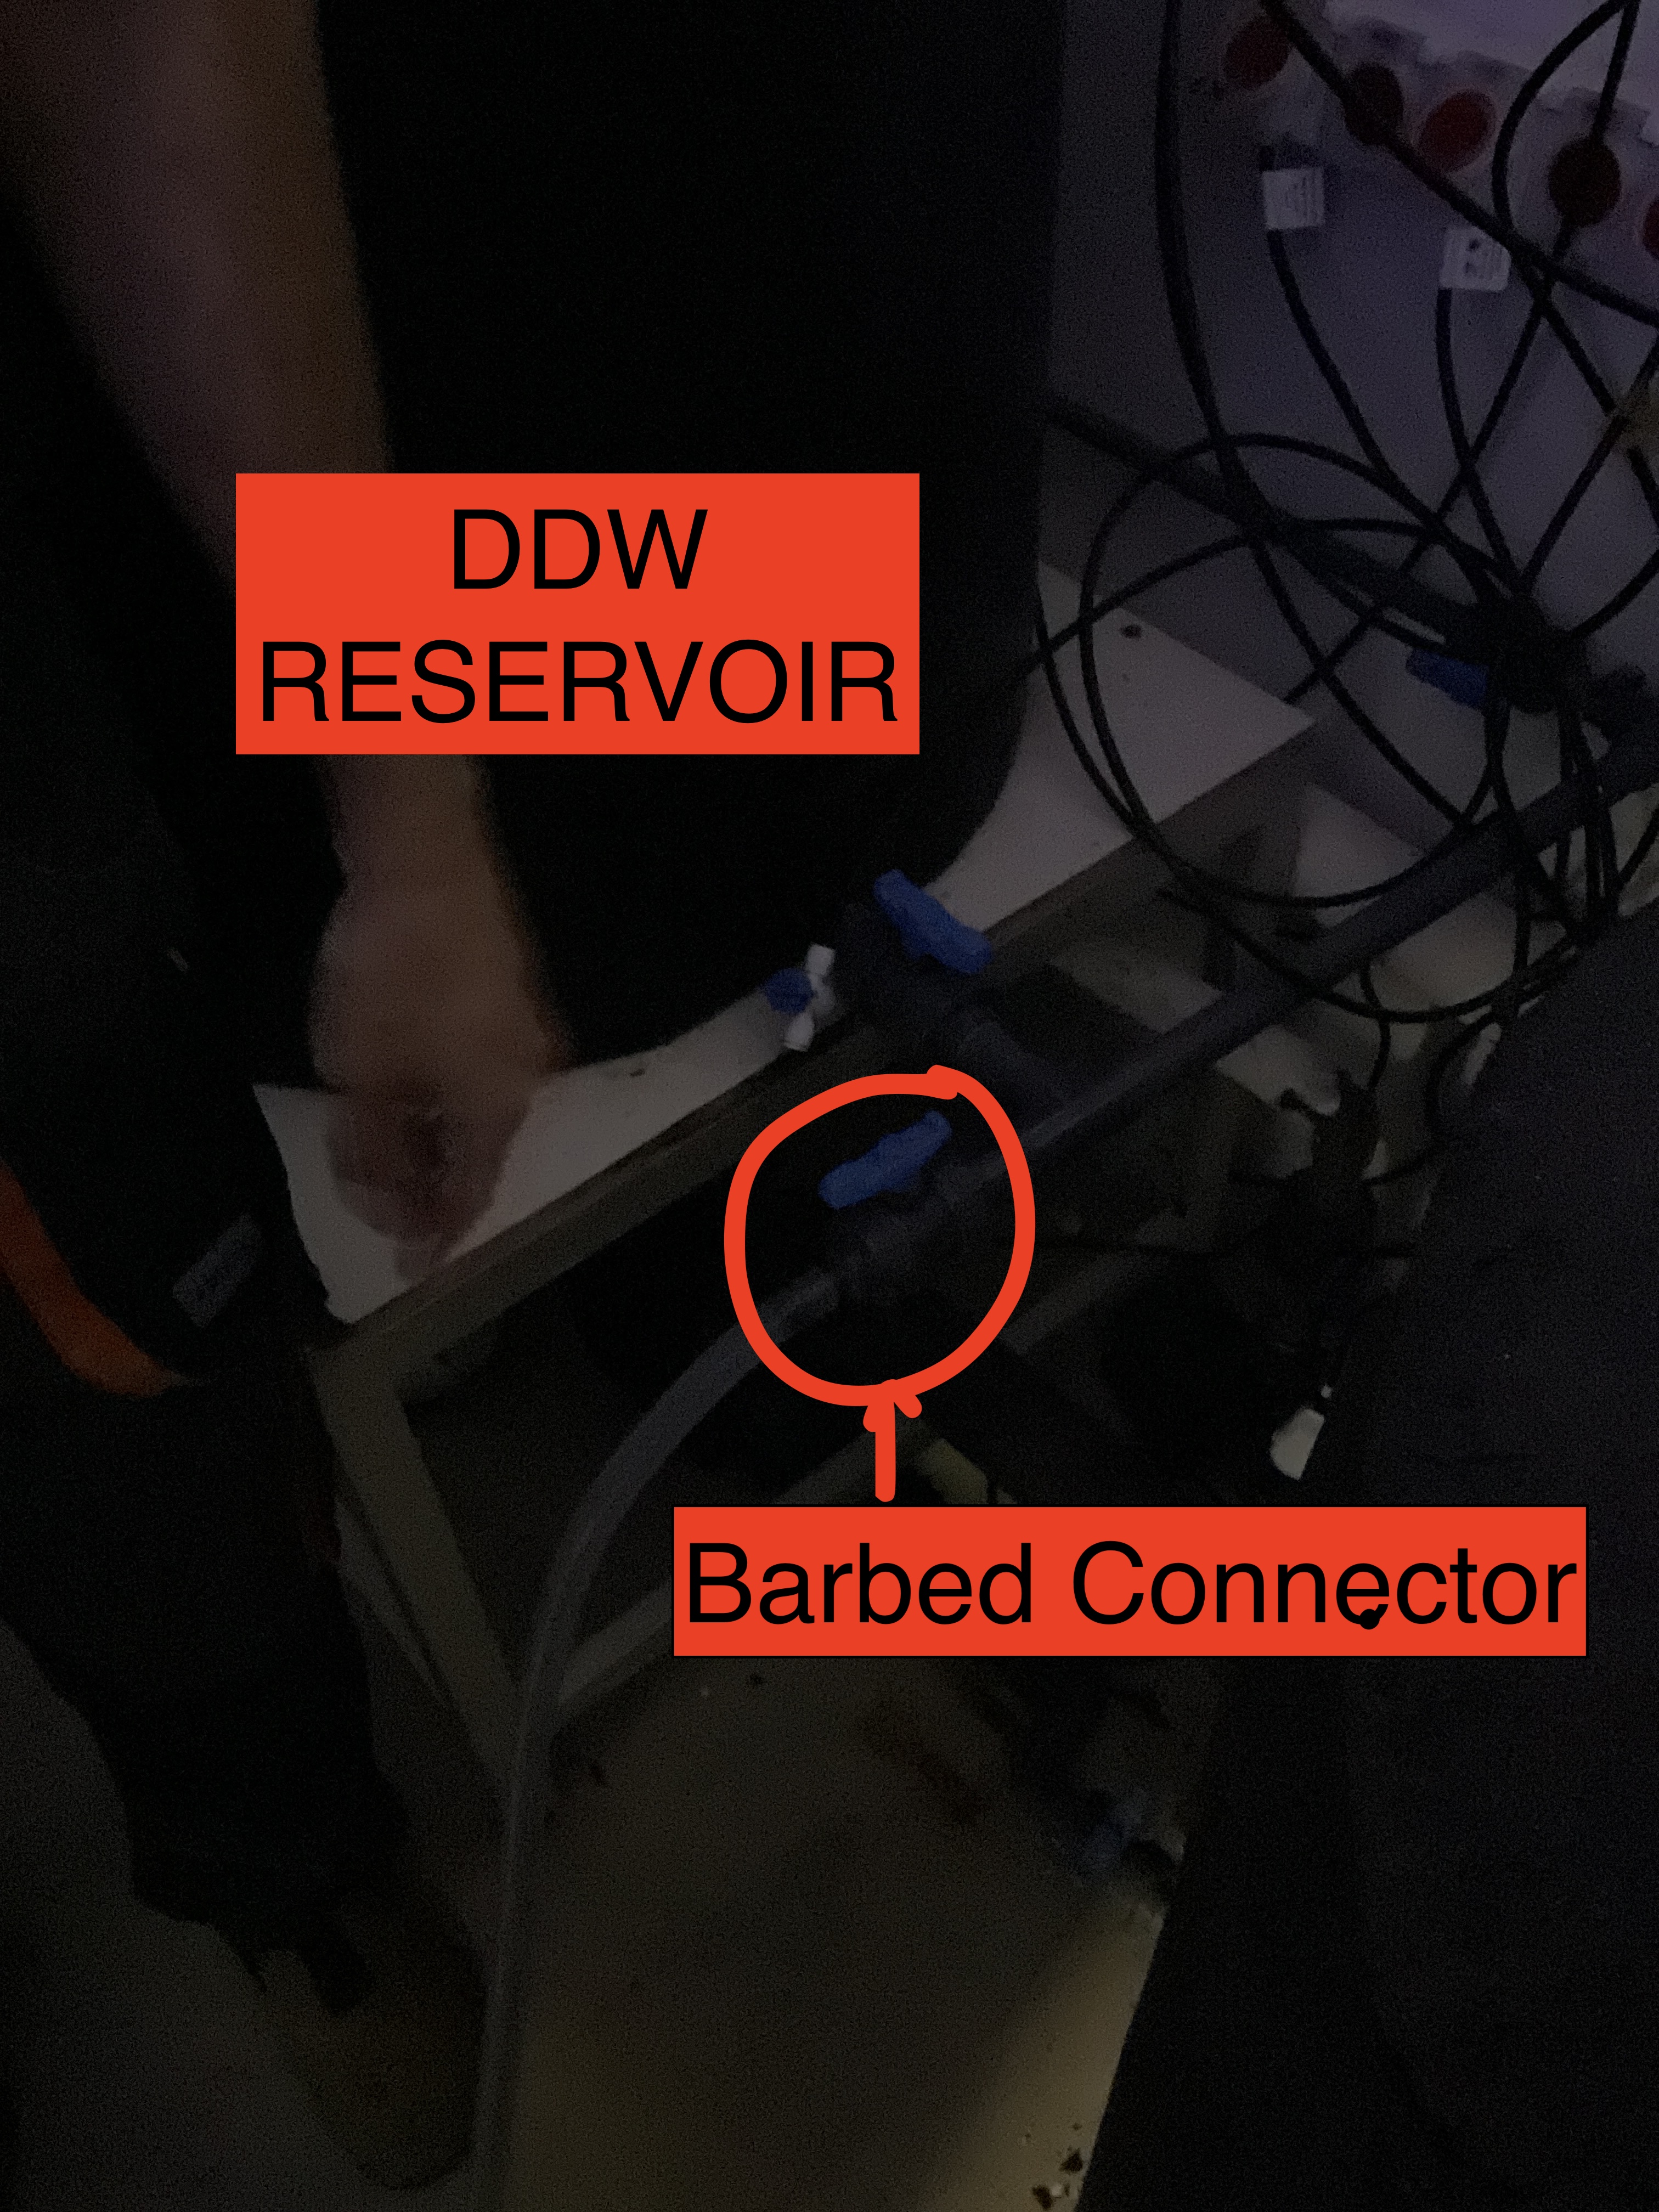
Figure 17: DDW barbed connector.
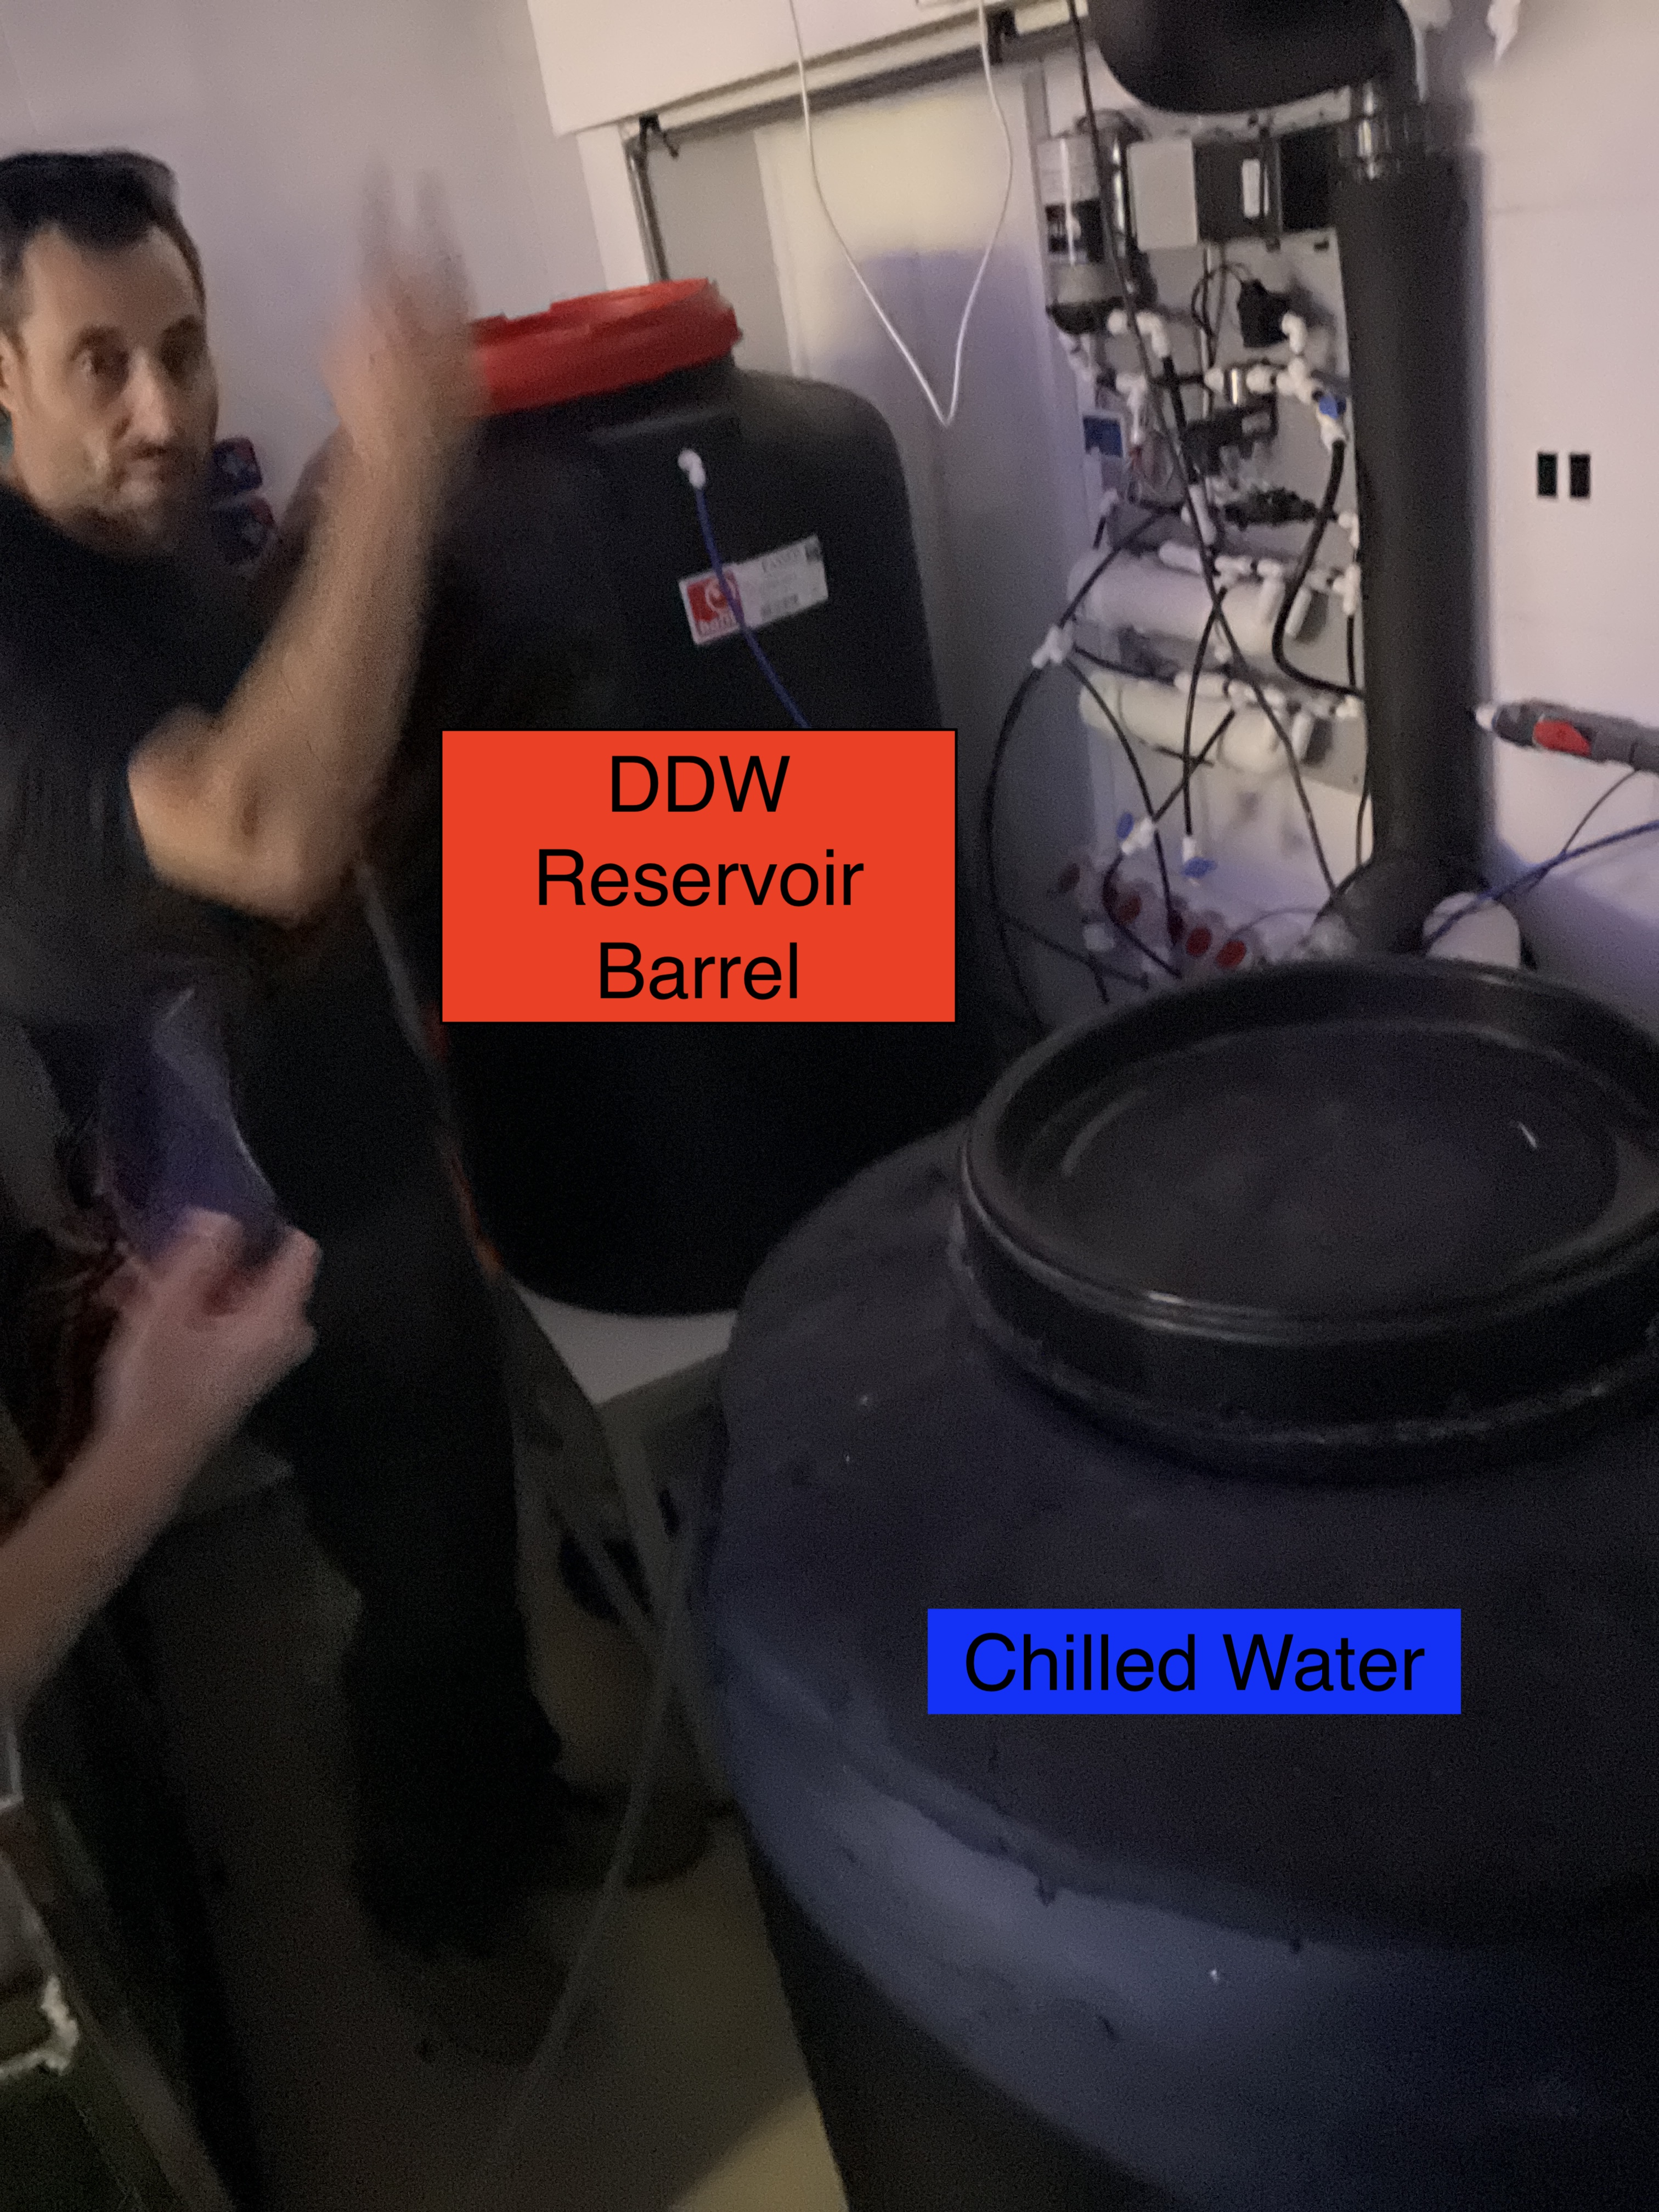
Figure 18: Attaching the tube.
Then connect the other end of the tube to the barbed connector of the saltwater reservoir barrel. IMPORTANT: Before refilling, turn off the pump in the reservoir barrel by flipping the left switch on the wall.
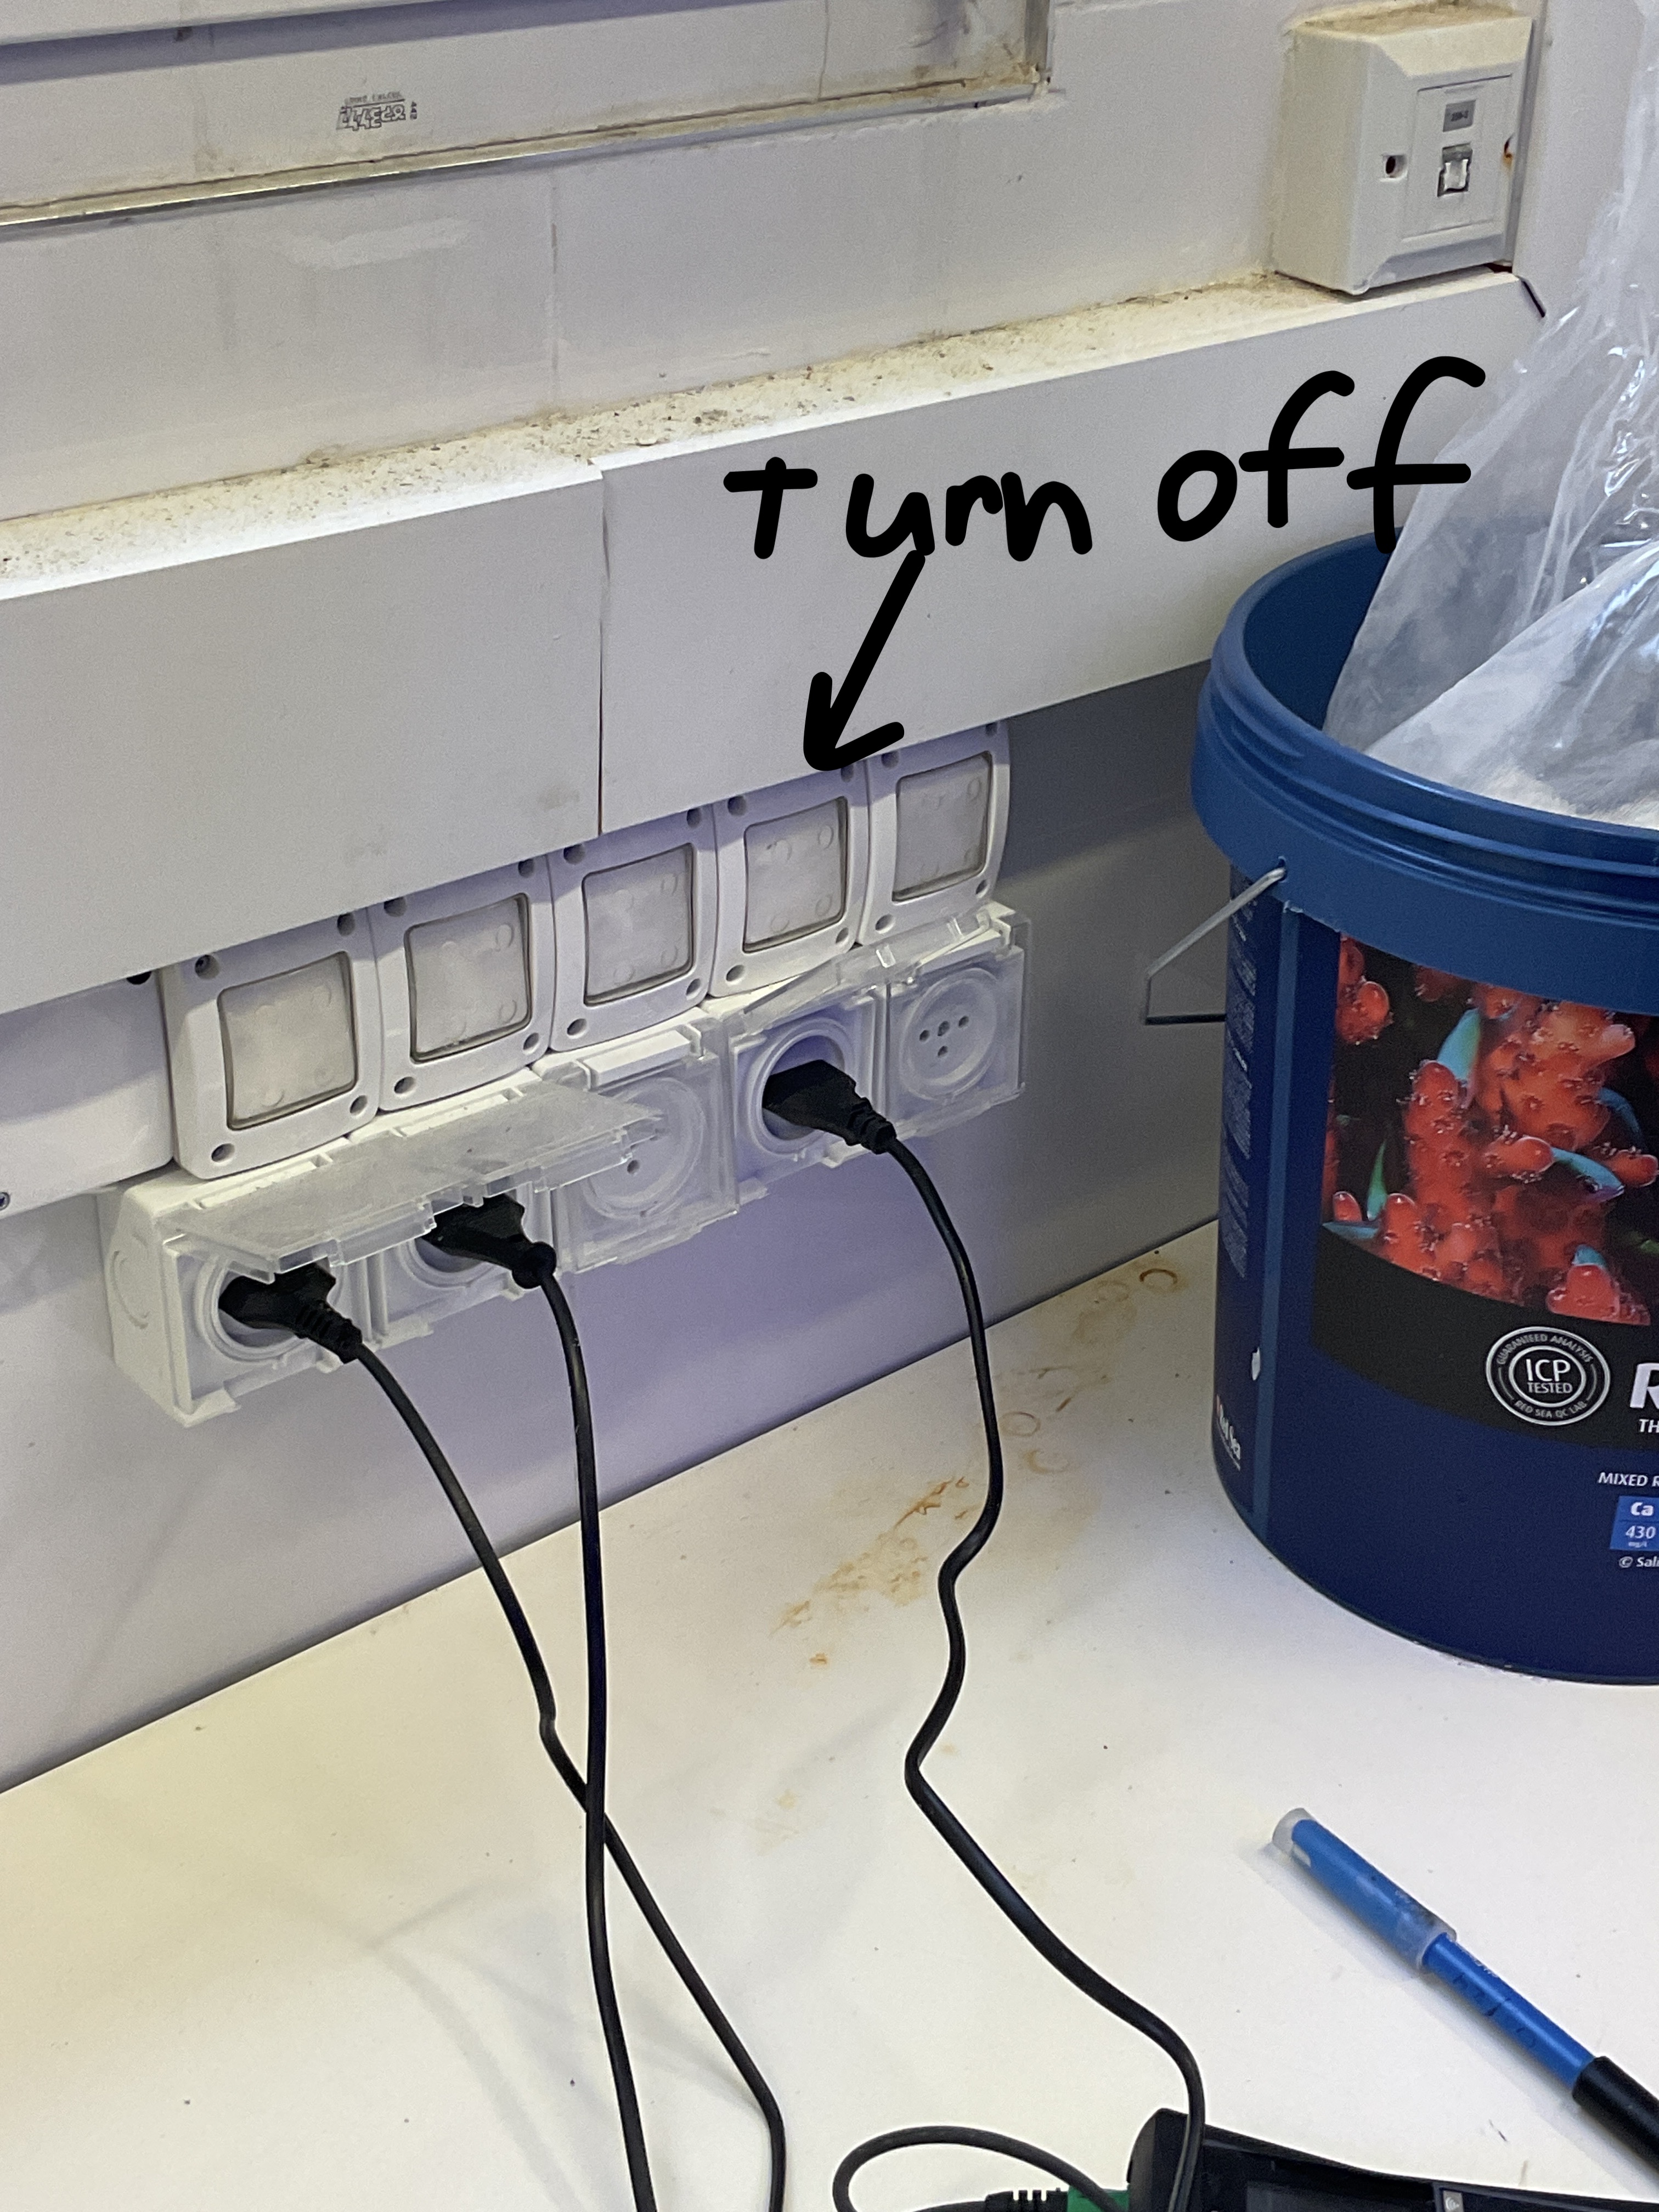
Figure 19: Wall switch for the reservoir pump.
Turn both valves to be open in the barrel, then turn the DDW barrel valve to be open and allow flow. Fill the reservoir barrel until the water level reaches the grey tubes at the top of the barrel. Once the saltwater barrel has been filled, turn the valve on the DDW reservoir to the closed position and allow the rest of the water to flow into the saltwater barrel.
Turn the water pump valve of the saltwater barrel to the closed position. Remove the freshwater tube and return to the top of the DDW reservoir barrel. Turn the switch for the water pump back on.
Add salt to the saltwater barrel using the cup inside the salt bucket nearby. For a completely refilled barrel of fresh DDW water, add 7 scoops of salt while the pump is running to be a starting salinity level for later water changes. Note: Always check the salinity of the reservoir before using the water. Sometimes people forget to add the salt or the levels can be off. It can take some time for the salt to completely dissolve and mix in the water.
Step 8: Double Check & Clean Equipment
Turn your sump back on. Rinse the salinity probe with DDW and dry with a paper towel. Return to the box and place it in the cabinet.
Use the DDW squirt bottle to rinse the sides of the aquariums, wipe with the squeegee (wiper with rubber blade), and dry with a towel.
Optionally, add a small amount of healthy bacteria and/or nutrients to your tank. Nutrients are deposited directly into the water column, while bacteria are poured into the second container of the sump (overflow before the black filter).
Double-check all the equipment. Is the water flowing correctly? Are the water exit tubes located ideally at the water surface? Is the protein breaker bubbling halfway up the head? Are the water mixers in the reservoir pumping?
Close both curtains in front of the tanks and turn off the light when exiting the aquarium room.
References and Resources
- Ammonia toxicity information: A review of ammonia toxicity on aquatic organisms
- Salinity Probe Online Protocol: WTW MultiLine 3310 Salinity Probe Operating Manual